Preparation
You will need following tools and sample code in this tutorial:
Ameba Transparent Data Transmission
In trasnparent data transmission, the network is only in charge of delivering the data to the destination node with guaranteed quality.
- Ameba UART Transparent Data Transmission
The main MCU is connected to Ameba via UART. Use AT commant to connect Ameba to server, to upload data and recieve data from server. In this tutorial, we use serial port on PC to simulate the MCU UART to send data.
- Development board/module Test
Here, we boot Ameba and test its functionality via LOG UART.
Ameba provides a set of LOG UART pin, GPIOB_0(LOG_UART_OUT) and GPIOB_1(LOG_UART_IN), to be used to receive user input and system message output.
- Ameba Board
Connect the board to PC via micro USB.
In general, the power can be supplied to development board by micro USB. However, if it is not, please supply power by VCC pin.
- Ameba Wi-Fi Module
If you use only the WiFi module, you need to connect the serial TX of PC to the GPIOB_1 pin on module and serial RX to GPIOB_0 pin on module. And the power should be supplied to VCC. (Note: Ameba requires 3.3V)
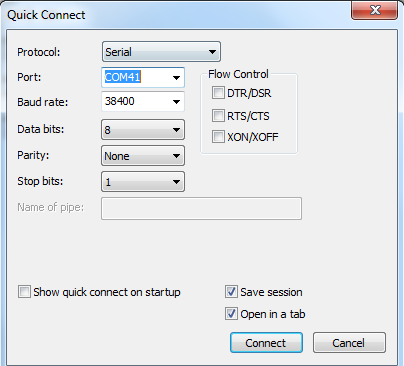
The default setting of Ameba LOG UART: baudrate 38400, data bits 8, parity none.Use terminal tool (e.g., SecureCRT, teraterm, …etc.) on PC to open the serial port. For example:
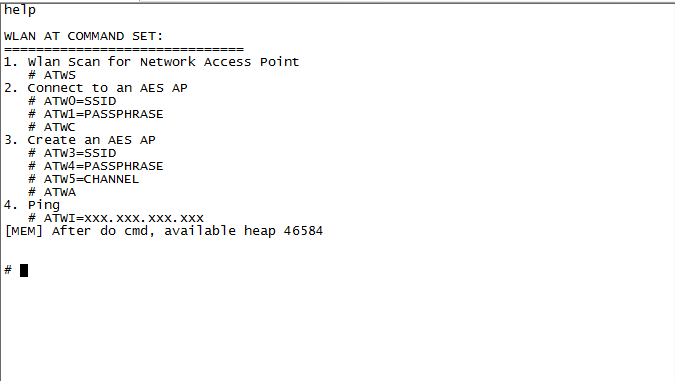
 After it is connected, enter “help”, then you should see similar messages:
If you do not get similar message, please check the following:
1. Check if the power is supplied normally and with correct voltage.
2. Check if the serial port is connected correctly.
3. If some garbled text is printed, please check the connection settings (baudrate, data bits, …etc.).
After it is connected, enter “help”, then you should see similar messages:
If you do not get similar message, please check the following:
1. Check if the power is supplied normally and with correct voltage.
2. Check if the serial port is connected correctly.
3. If some garbled text is printed, please check the connection settings (baudrate, data bits, …etc.).
- Upgrading AT Firmware
Please OTA upgrade the AT firmware tp v2.1.x.(Download: AT firmware v2.1.0)
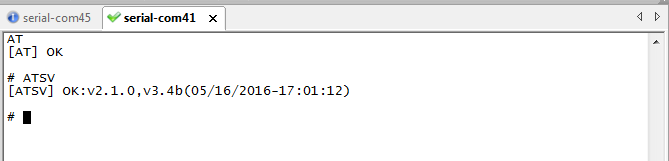
To check the AT command version, enter “AT” in terminal tool. If you get response “unknown command ‘AT'”, the AT command version is v1, otherwise it is v2.
- AT V1 upgrade
1. Connect Ameba to WiFi AP, which is the same AP your PC is connected to.
Assume the AP has the following settings: SSID=test, PASSWORD=12345678
Use below commands to connect to the AP:
ATW0=test
ATW1=12345678
ATWC
2. Go to the DownloadServer directory on your PC (../SDK/ tools/DownloadServer). Modify and execute “start.bat” according to the description in readme.txt (if some error related to permission occurs, please right-click on start.bat and execute as administrator).
3. Enter upgrading command in serial terminal. When the upgrade is finished, please wait for system reboot.
ATWO=192.168.0.1,8080 (assume that the PC address is 192.168.0.1, port 8080)
- AT V2 uprade
1. Confiure Ameba to STA mode and connect to AP, which is the same AP your PC is connected to.
Assume the AP has the following settings: SSID=test, PASSWORD=12345678
Use below commands to connect to the AP:
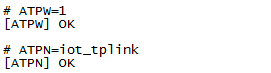
ATPW=1
ATPN=test,12345678
2. Go to the DownloadServer directory on your PC (../SDK/ tools/DownloadServer). Modify and execute “start.bat” according to the description in readme.txt (if some error related to permission occurs, please right-click on start.bat and execute as administrator).
3. Enter upgrading command in serial terminal. When the upgrade is finished, please wait for system reboot.
ATSO=192.168.0.1,8080 (assume that the PC address is 192.168.0.1, port 8080)
- AT V2 UART Connection
In AT V2 firmware, we use a set of AT UART (RX: GPIOA_0/TX: GPIOA_4) to handle the input and response of AT command. Use dupont wire to connect Ameba GPIOA_0 to PC serial TX and GPIOA_4 to PC serial RX.
Make sure the AT firmare is upgraded to v2.1.x through AT UART.
Please refer to AT command manual
Server Configuration
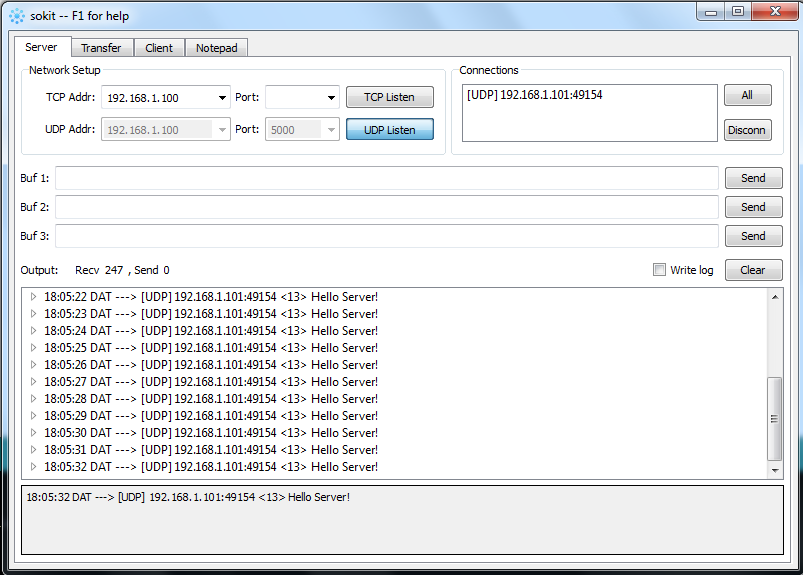
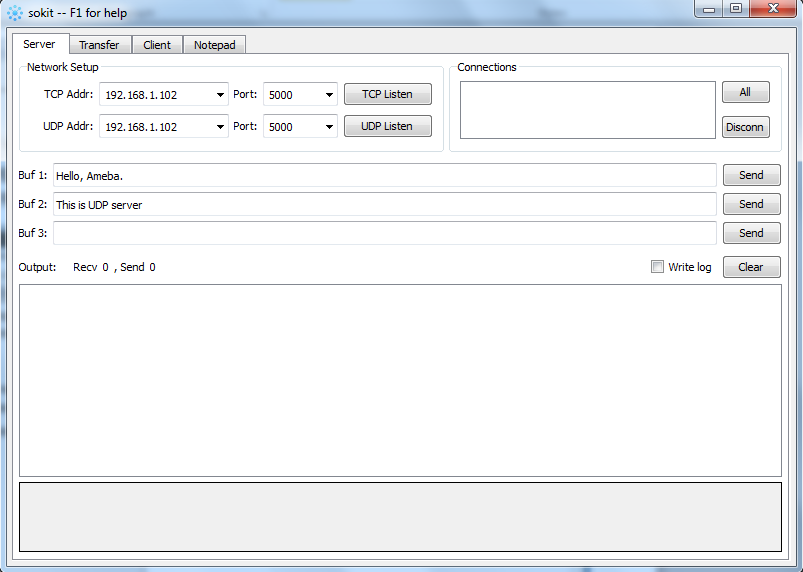
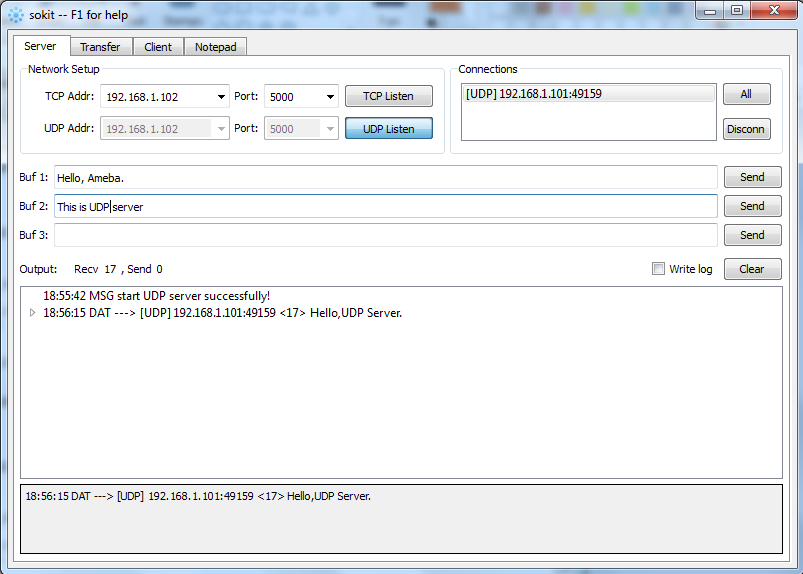
In this tutorial, we use sokit 1.3 to create TCP/UDP server, and transmit data to the created server through Ameba transparent data transmission.
Server configuration:
1. LAN
Server (TCP/UDP) and client must be in the same network.
2. WAN
If the server is on a host with Internet IP, Ameba must also be connected to the Internet so as to connect to the server.
Ameba TCP Transparent Data Transmission
Create a TCP server by sokit (port 5000).
1. Use “ATPW” to configure Ameba to STA, execute “ATPN” to connect Ameba to an OPEN AP (SSID: iot_tplink).

2. Use “ATPC” to create TCP client on Ameba and connect to TCP server.
3. Use “ATPK” to enable auto-receive data.

By enabling auto-receive data, Ameba transmits data to host MCU in an active way. If it is not enabled, host MCU has to use “ATPR” command to get data from the buffer of Ameba.
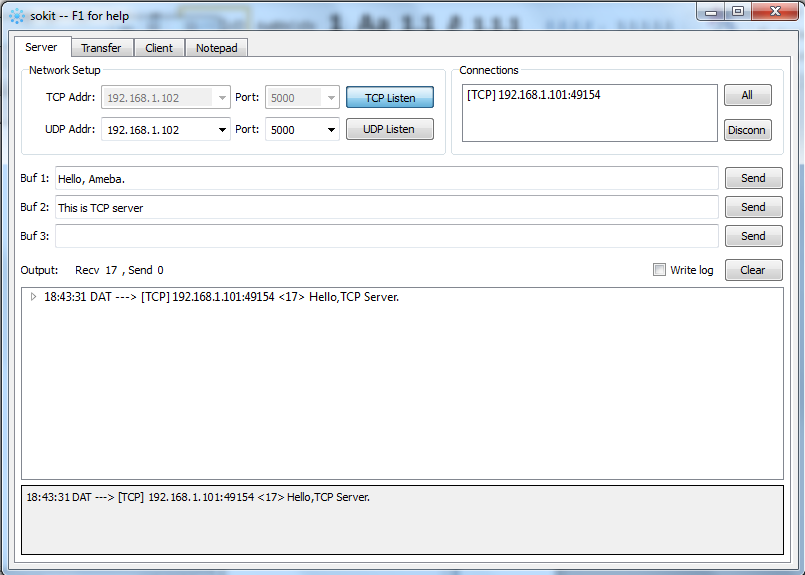
4. Use “ATPT” to send data to server

The 17 character message “Hello,TCP server.” is sent to server. You can use sokit to check the received message:
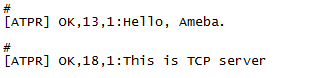
5. Send data to client
In sokit server, choose the current TCP connection. Send two messages: “Hello, Ameba”, “This is TCP server”.
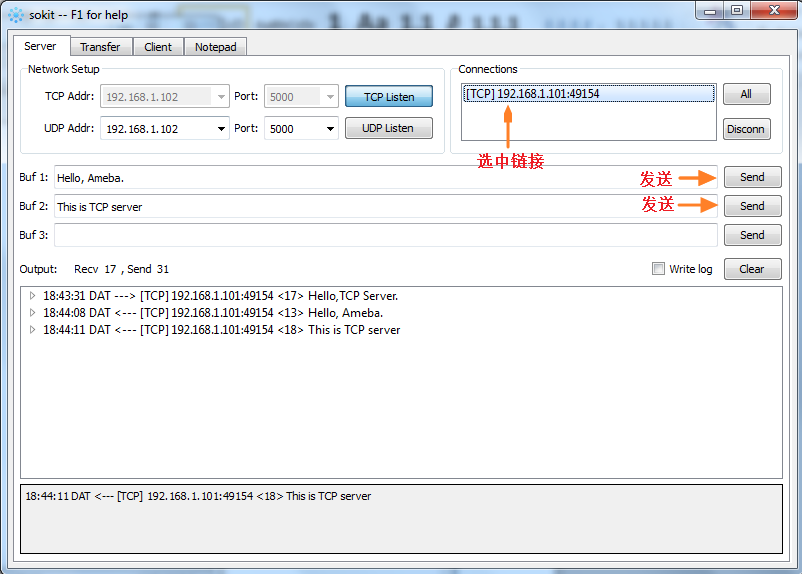
Then check the received messages printed on host serial terminal:
6. Use “ATPD” command to close the TCP connection and free socket resource.

Ameba UDP Transparent Data Transmission
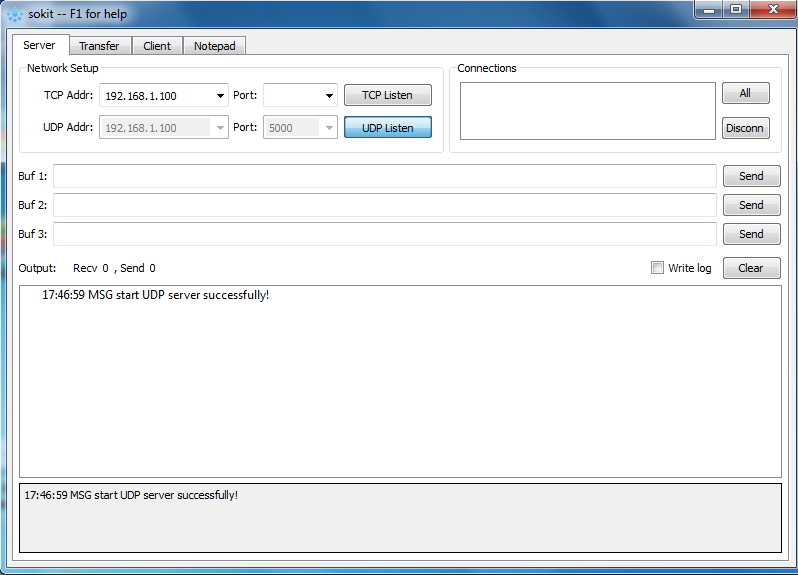
Create a UDP server by sokit (port 5000).
1. Use “ATPW” to configure Ameba to STA, execute “ATPN” to connect Ameba to an OPEN AP (SSID: iot_tplink).
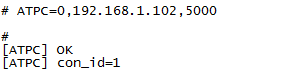
2. Use “ATPC” to create UDP client on Ameba and specify server ip and port.
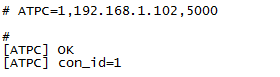
After te UDP client is created, it occupies a socket channel and returns “OK” and a connection id (which will be used when we send data).
3. Use “ATPK” to enable auto-receive data.

By enabling auto-receive data, Ameba transmits data to host MCU in an active way. If it is not enabled, host MCU has to use “ATPR” command to get data from the buffer of Ameba.
4. Use “ATPT” to send data to server

The 17 character message “Hello,UDP server.” is sent to server. You can use sokit to check the received message:
5. Send data to client
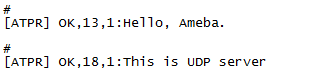
In sokit server, choose the current UDP connection. Send two messages: “Hello, Ameba”, “This is UDP server”.
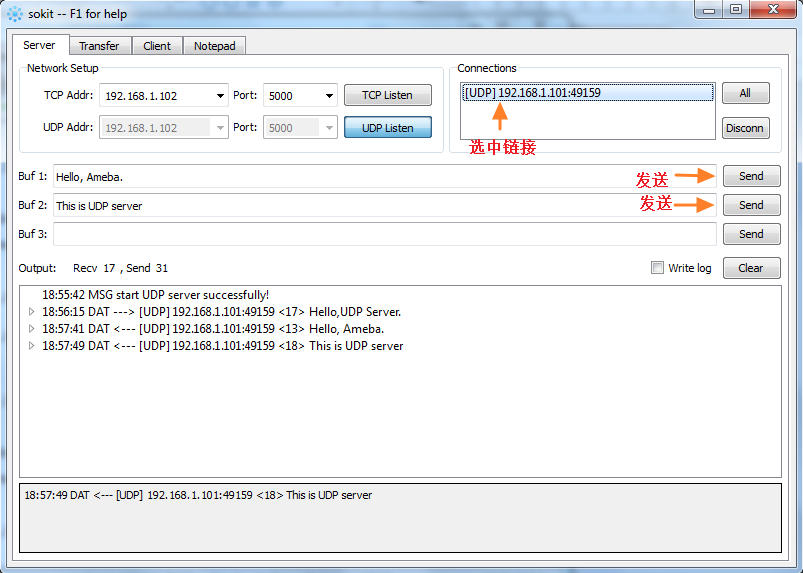
Then check the received messages printed on host serial terminal:
6. Use “ATPD” command to close the UDP connection and free socket resource.

Arduino + Ameba UDP Transparent Data Transmission Example
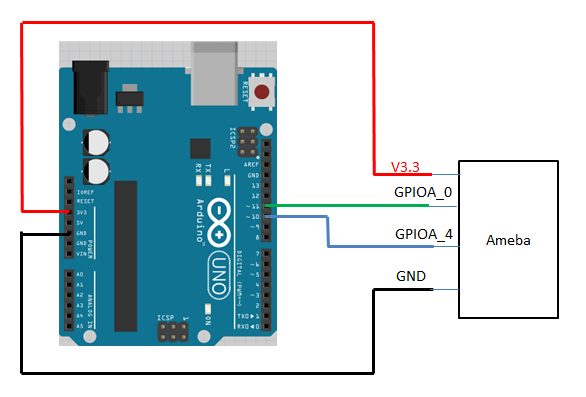
Use Arduino UNO with Ameba to realize UDP Transparent Data Transmission.
Wiring diagram:
Create a UDP server by sokit (port 5000).
Open the Rtl871xAF_Example.ino sample code in Arduino IDE (Download:
Sample code)
Modify the parameters in sample code, then compile and download to board.
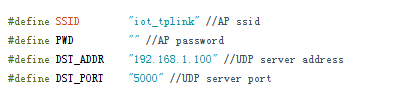
Wait for about 10 seconds, Arduino would start to send “Hello Server” messages to server continuously: