Alexa 简介
Alexa 是 Amazon 底下的智慧语音服务,它能聆听使用者的语句,并且以语音回答。
底下是Amazon的Alexa影片介绍: https://www.youtube.com/watch?v=UOEIH2l9z7c
Amazon也推出实体产品像是Amazon Echo智慧音箱,里面搭载Alexa服务: https://www.youtube.com/watch?v=FQn6aFQwBQU
语音服务的使用情境里,使用者不用再“拿起” 或“掀开” 3C产品,第一步通常是用关键字唤醒产品,像是说出“Alexa”, 接着可以说出一些问题或命令。像是今天天气如何,播放音乐,设定一小时后的闹钟。
Alexa同时也支援Alexa Skill,让3rd party的个人或公司参与开发。像是可以下载说故事的Alexa Skill,Alexa就拥有说故事的能力。
Alexa Skill里面也包含智慧家庭的服务,支援常见的智慧家庭的产品像是智慧灯泡、智慧开关、智慧门锁等等……。
这个范例里,会介绍如何让Ameba也支援Alexa的服务,让使用者可以对Ameba询问今天有什么新闻,或是控制支援AWS IoT的产品,像是之前的范例里示范过如何用Alexa经由AWS IoT开关Ameba上的灯泡。
准备事项
Alexa服务包含了 AVS (Alexa Voice Service) 以及 ASK(Alexa Skill Kit),要让Ameba支援Alexa最主要需要设定与支援AVS。另外Ameba的语音处理需要一块支援I2S的Audio codec、一个喇叭。
1. Ameba * 1
2. ALC5680 *1
3. Button *1
4. Speaker *1
- 設定 Alexa Voice Service
第一次使用可以参考官方文件做设定
https://developer.amazon.com/public/solutions/alexa/alexa-voice-service/getting-started-with-the-alexa-voice-service#register
它分成4个步骤:
- Step 1: Register Your Product
这部份主要是帐号设定 - Step 2: Prototype
这部份我们会在Ameba上面写程式支援Alexa,到这一步已经可以做一些基本的控制 - Step 3: Design and Build with AVS
这部份则是细节控制,像是设定麦克风数量、装置预设的距离等等。这个范例里我们不会执行到这步 - Step 4: Launch Your Product
这部份是关于如何将产品上市。这个范例里我们不会执行到这步
- 注册成为Amazon开发者
第一步里,要先成为Amazon 开发者,第一次设定会先填写注册表单
https://developer.amazon.com/registration/profile.html
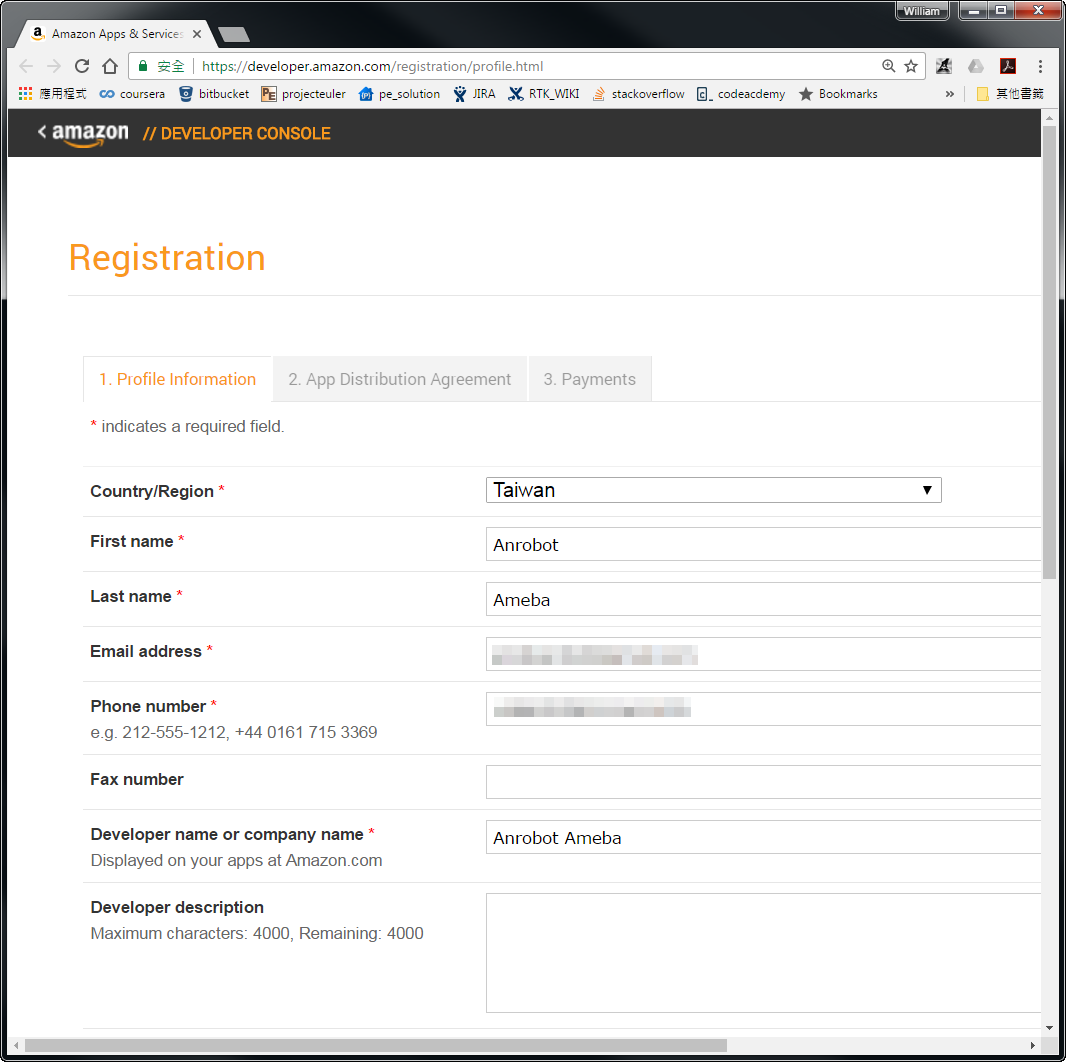
填完之后,点选表单后面的 “Save and Continue”
接着会出现同意书,阅读完之后如果同意请点选 “Accept and Continue”
接着会询问App内购与广告的资讯,这部份可以之后再更改,我们先跳过,点选 “Save and Continue”
- 新增AVS App
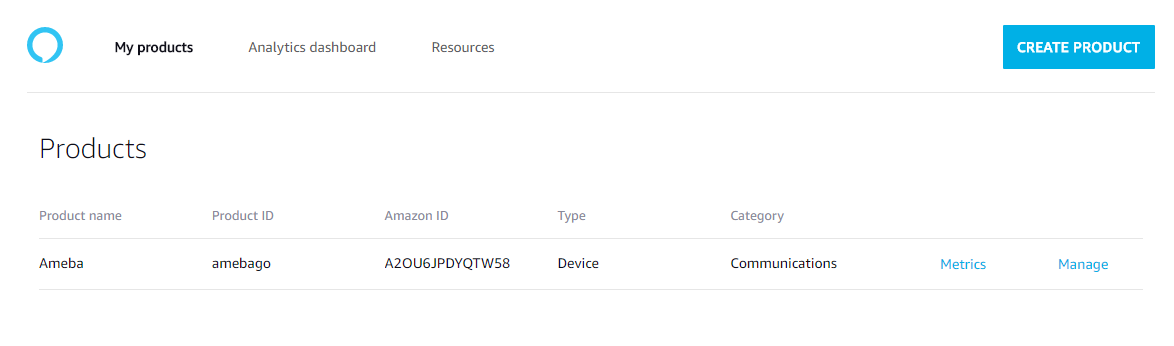
填完之后会来到Amazon开发者的管理后台
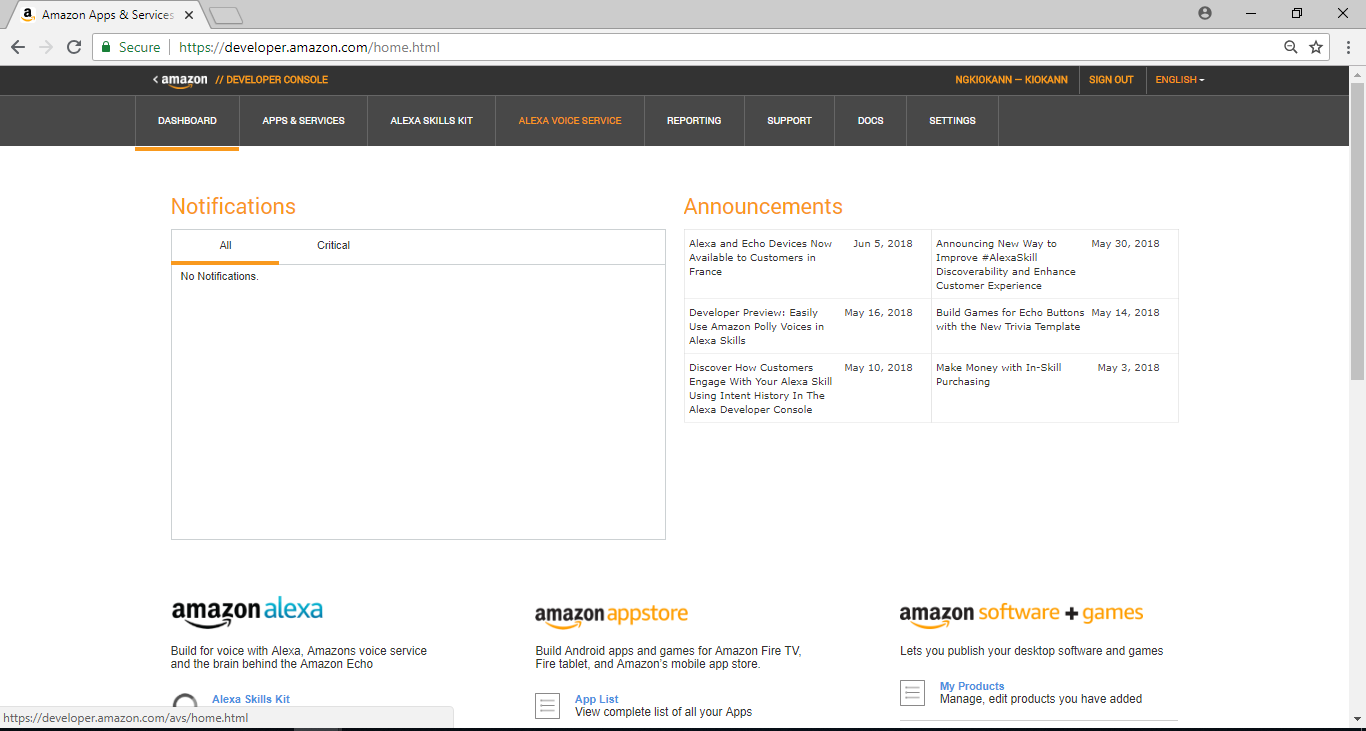
我们点选 “Alexa Voice Service”
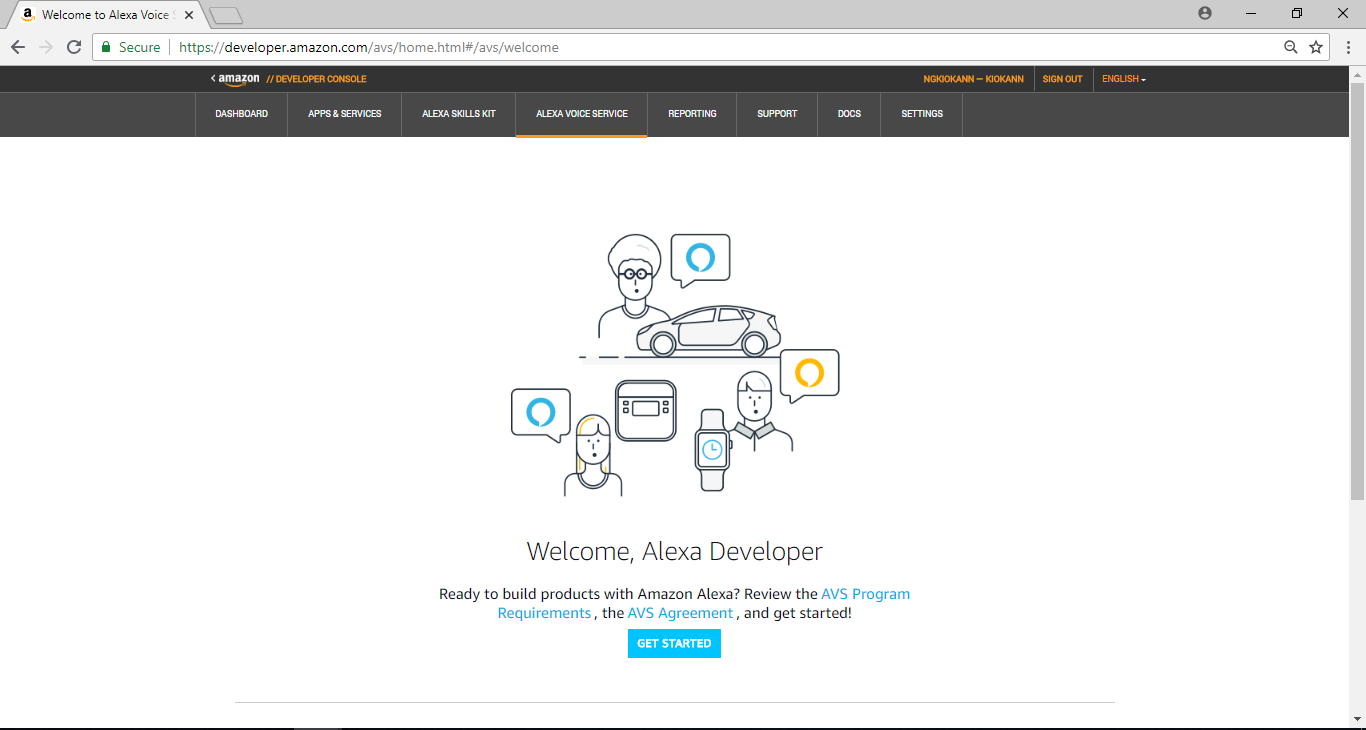
之后点击”Get Started”开始Arduino Alexa的设定流程
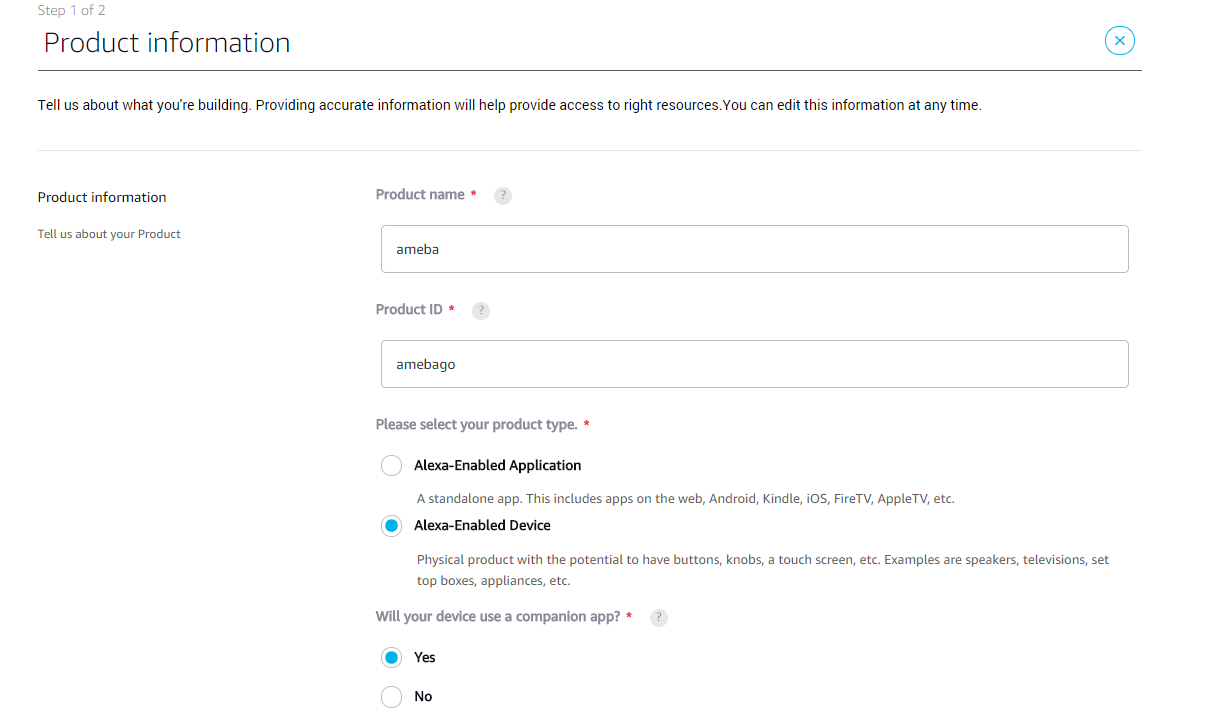
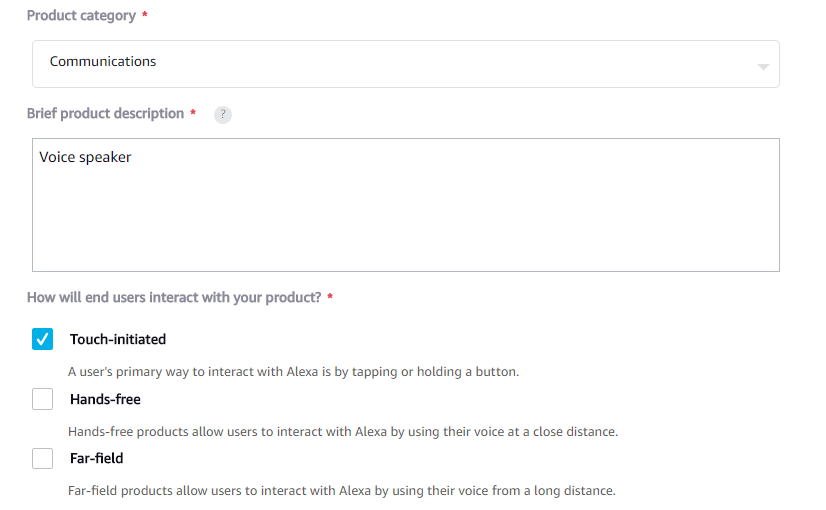
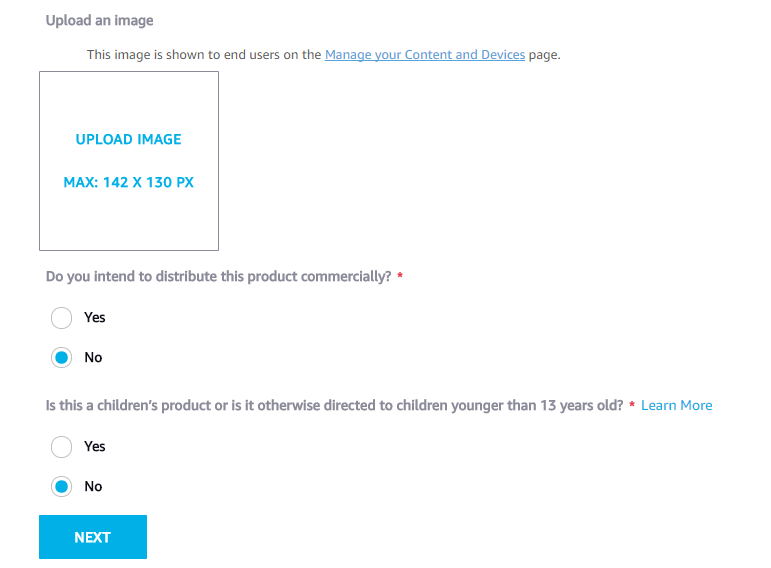
- Product Information
这个页面里要填写device相关的资讯:
1. Product Name: 这里的资讯应该会与我们在注册成为开发者的一样
2. Product Type ID: 只能使用字母, 数字, 与底线。这里面的内容会在范例里用到
3. Product Type: 选择 Alexa-Enabled Device
其他栏位及选项如下列图片所示,结束后按NEXT
- Security Profile
接着要设定Security profile,如果之前没有设定过,就需要新增一个,我们点选 “Create a new profile”
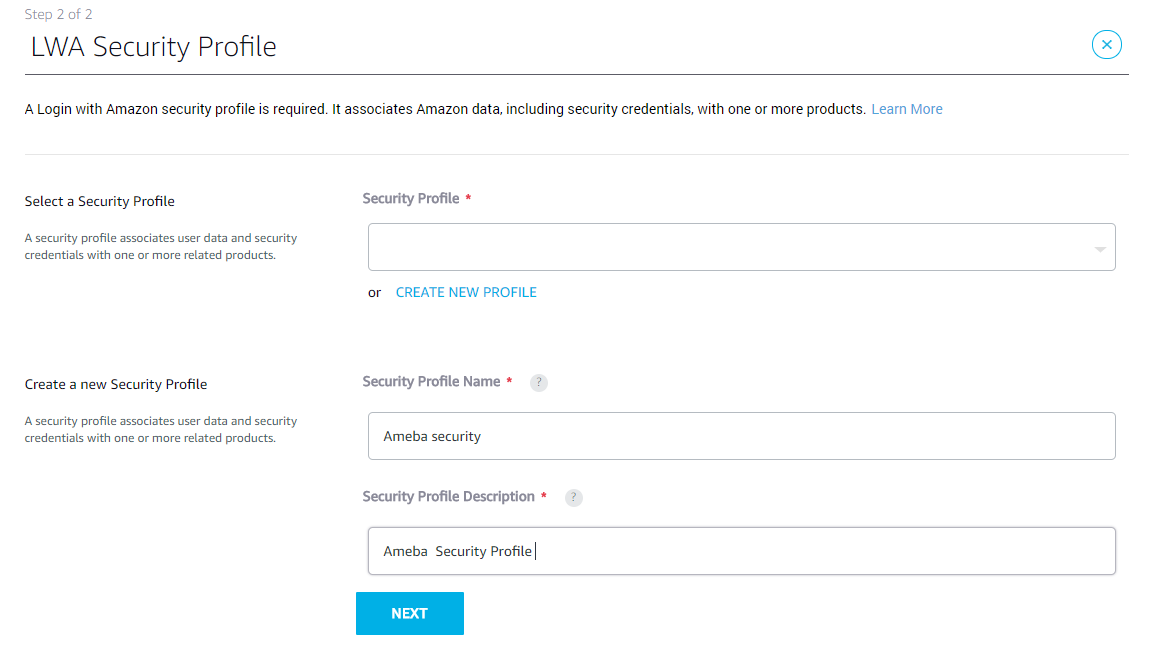
在 General里有两个栏位要填:
1. Security Profile: Security profile的名字
2. Security Profile Description: Security profile的描述
填完之后按 “Next” 即会产生Security Profile ID
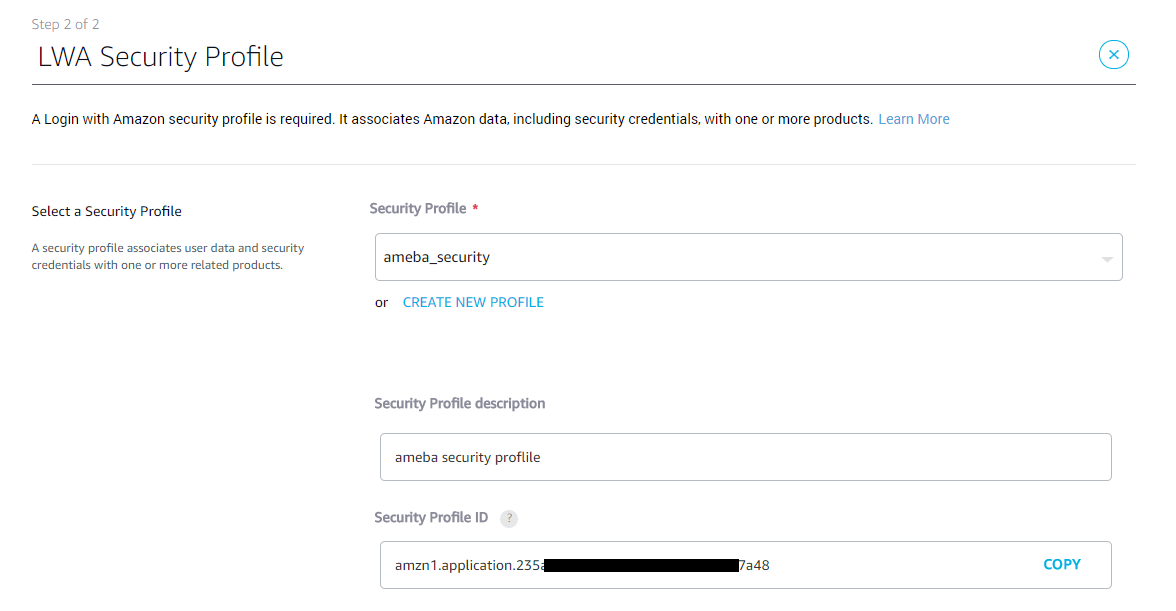
接着会产生一组 Client ID 与 Client Secret,这里面的内容会在范例里用到,我们可以先记下来,或是之后再回来查看。
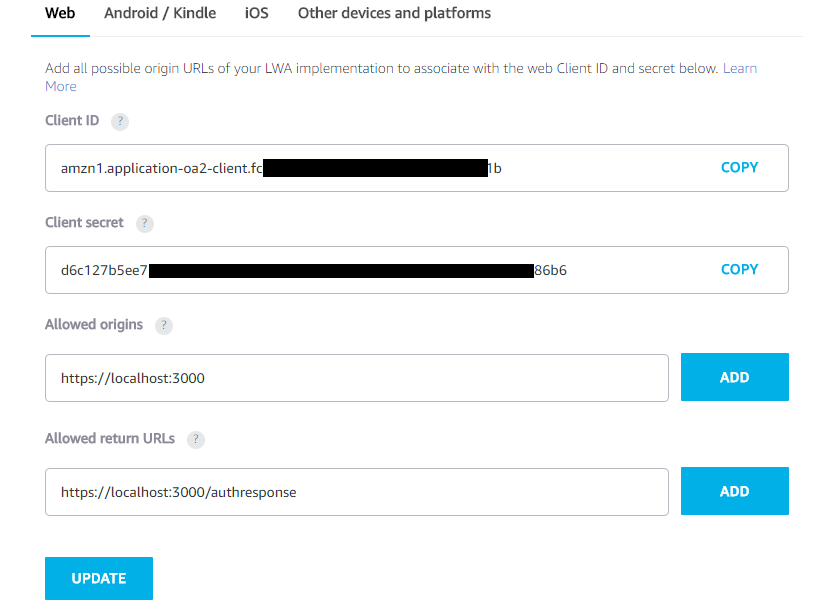
接着要填写的是当使用者要授权Ameba使用Alexa的时候,要到哪个网址取得讯息,以及该如何将授权讯息回传。这里我们使用mDNS的位址:
1. Allowed Origins: https://localhost:3000
2. Allowed Return URLs: https://localhost:3000/authresponse
填完之后点分别在栏位右边按下”ADD”,接着按下”UPDATE”
之后出现上图的页面代表设定大功告成。
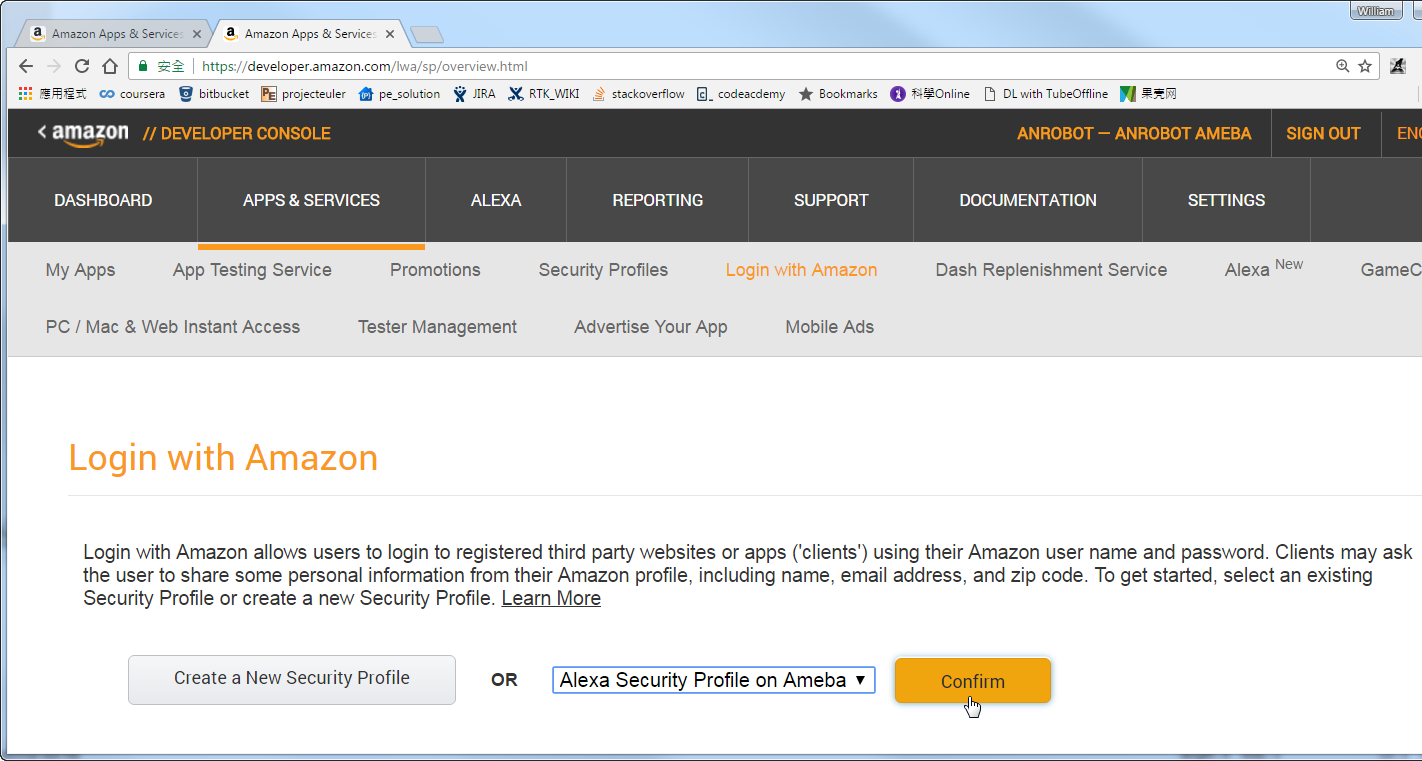
- Enable security profile
接着我们要启用前面设定好的 Security profile https://developer.amazon.com/lwa/sp/overview.html
选择刚刚设定的 Security Profile,并点选 “Confirm”
接着要填写第一次登入使用时,要显示privacy policy的URL,可以任填。这里我们填一样的mDNS位置。然后点选 “Save”
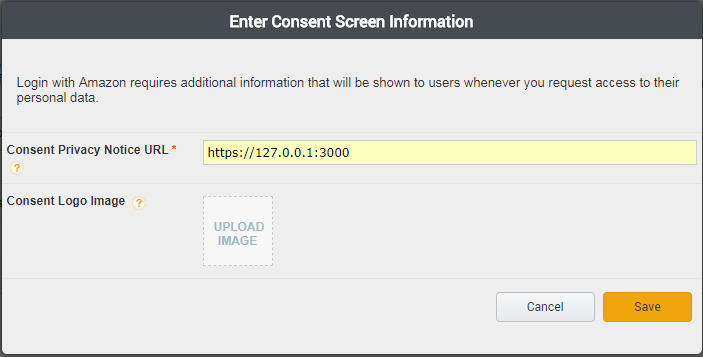
到这里就完成AVS的设定
- 申请Refresh Token
为了减少本范例在运作期间,进行申请Refresh Token所花费的耗能,我们提前在范例运作前先作申请。
Github上提供了Windows/Linux的申请工具:
https://github.com/ambiot/amb1_arduino/tree/master/misc/amazon_alexa_avs_auth_tool
在执行前得先使用openssl产生certificate
openssl genrsa -out ca.key 4096
openssl req -new -x509 -days 365 -key ca.key -out ca.crt -sha256
会产生ca.key及ca.crt两个档案,将这两个档案与申请工具放在同一个资料夹而在Linux下则需要先将Refresh Token tool申请工具编译:
gcc -o amz_oauth_linux amz_oauth_linux.c -lssl -lcrypto
并且执行
./amz_oauth_linux
如果在Windows底下可以开启cmd执行Refresh Token申请工具:amz_oauth_windows.exe
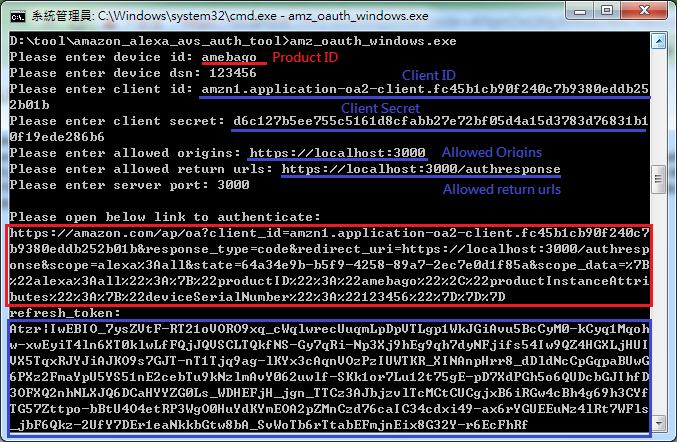
上图是Refresh Token tool执行期的画面,以下需要填入刚在Alexa Voice Service申请取得的相关栏位资讯
1. device id: 这里请填Product ID
2. device dsn: 通常是一组流水号,目前还未有具体的使用情境,我们先任意填
3. client id: 这里请填Client ID
4. client secret: 这里请填client secret
5. allowed origins: 这里请填https://localhost:3000
6. allowed return urls: 这里请填https://localhost:3000/authresponse
7. server port: 这里请填3000
之后会跑出如上图标示红框处的一段连结,将这段连结拷贝组合后贴上浏览器进行Refresh Token的申请,如果申请成功,页面会显示Refresh Token的参数,并且原来的cmd console也会显示Refresh Token(如上图标示蓝框处)

材料准备
- Audio codec
Ameba本身有I2S的介面可以处理Audio data,这个范例里我们使用Realtek Audio Shield做为I2S的资料来源。
Realtek Audio Shield使用的IC是ALC5680,通常Audio codec至少会使用到一组I2S与I2C。 I2S是资料I/O,I2C则是初始与选项设定。底下是Realtek Audio Shield的官网介绍
http://www.realtek.com.tw/press/newsViewOne.aspx?NewsID=441
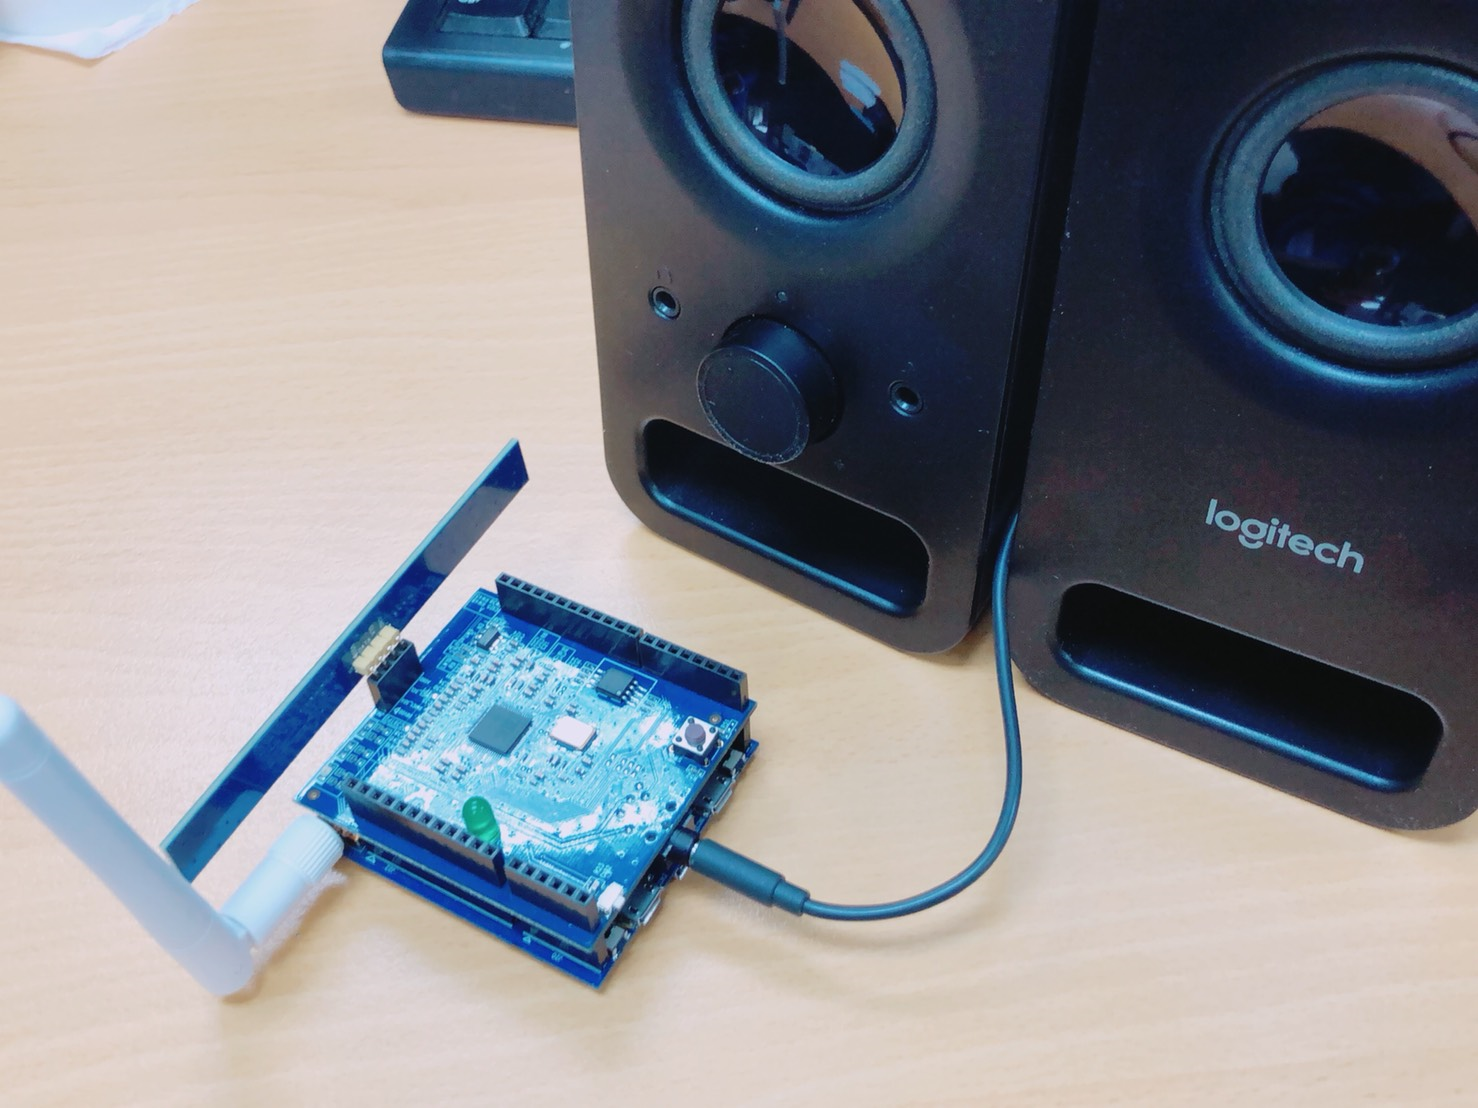
- 喇叭
这块Audio codec上面并没有喇叭,所以我们还需要外接喇叭。
喇叭的部份,用一般支援LINE IN的喇叭即可。
接线与范例设定
- 接线
Realtek Audio Shield可以完整与Ameba嵌合,在Realtek Audio Shield上另外还需要一个按钮用来唤醒Ameba的Alexa服务(下图标示红框处)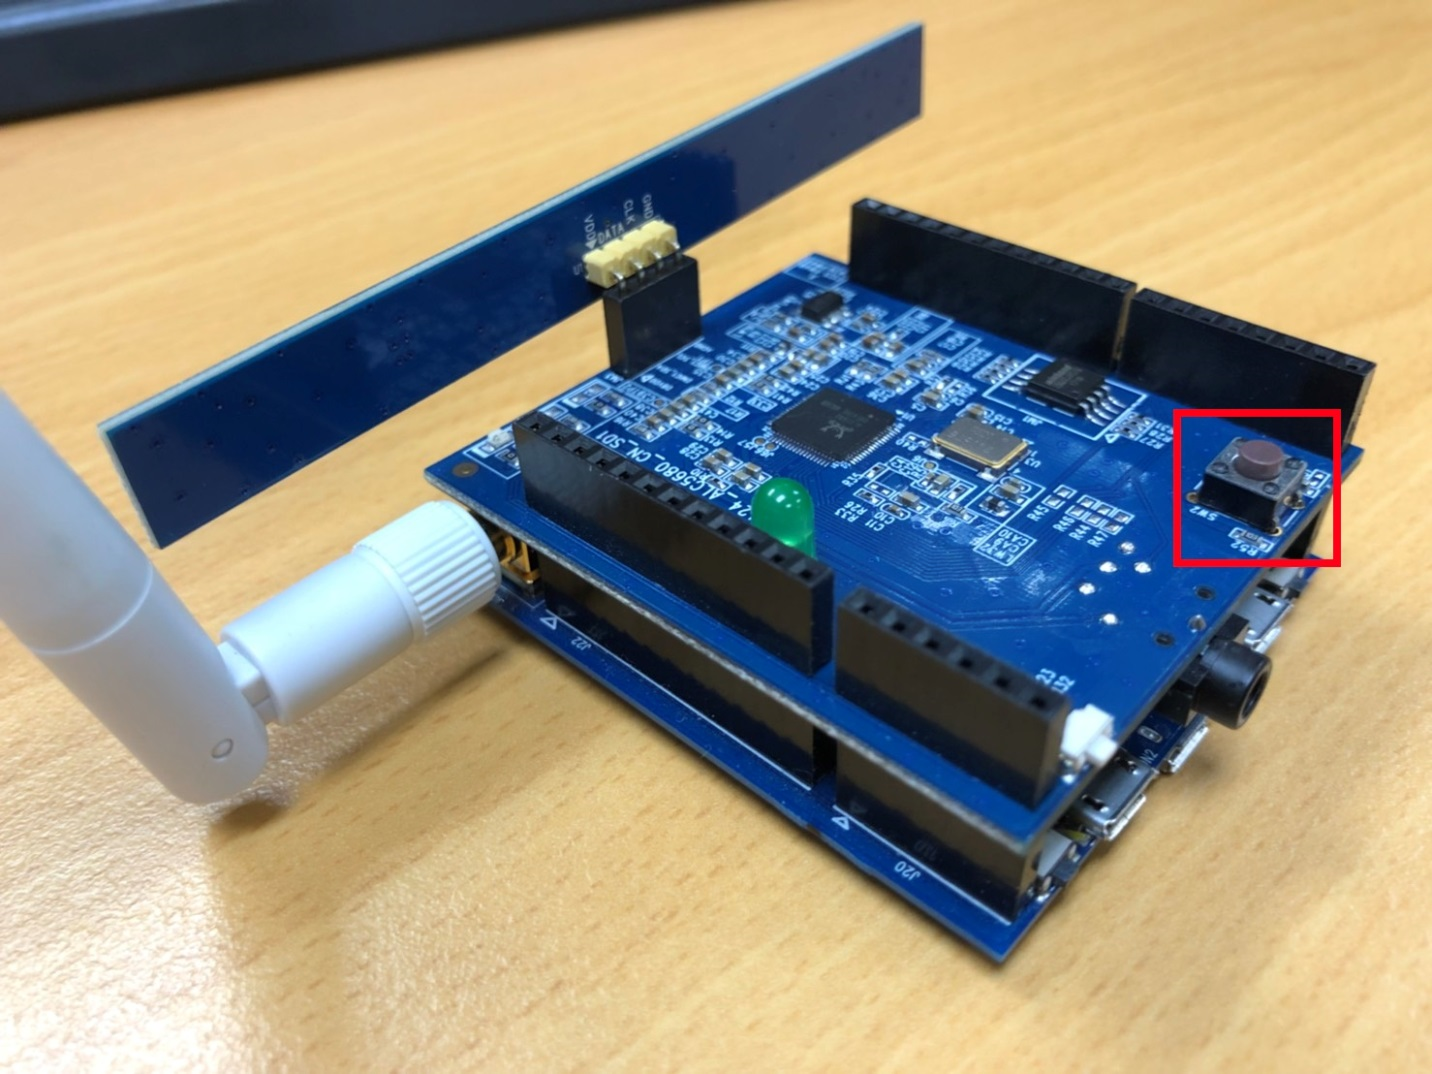
接着我们将Ameba接上Audio Shield 与喇叭。
- 上传程式
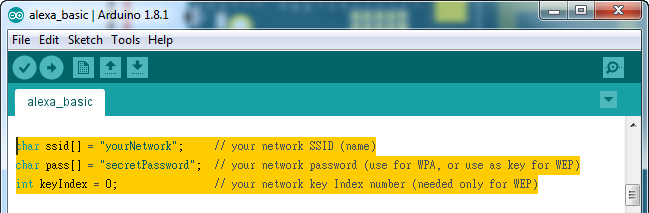
接着我们打开范例 “File” -> “Examples” -> “AmebaAudio” -> “alexa_basic”
Alexa服务需要使用到网路,这里我们修改SSID & PASS成欲连上的WiFi AP SSDI & PASS
接着要填写与AVS服务相关的资讯,说明如下:
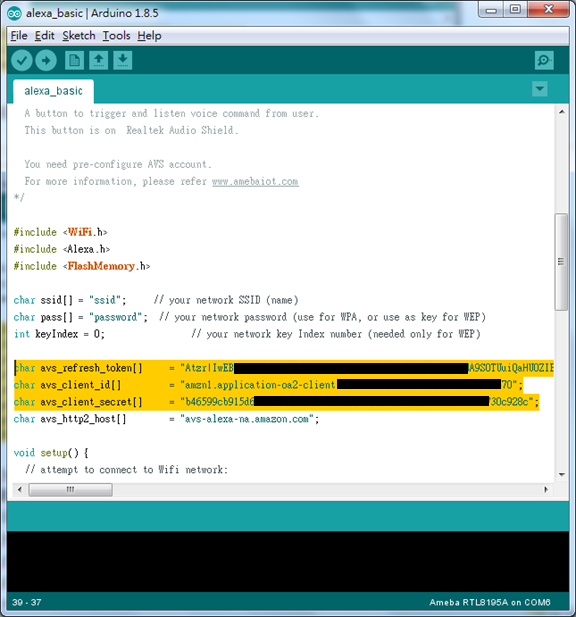
- avs_refresh_token: 此栏位填入由refresh token申请工具取得的refresh token。
- avs_client_id: 这里的 client id就是之前设定 AVS时取得的client id
- avs_client_secret: 这里的 client secret 就是之前设定 AVS 时取得的 client secret
- avs_http2_host: 提供辨识语音的host,目前Amazon提供好几组host供不同语系的使用者使用。这里我们填美国在使用的host
填完之后就可以编译上传至Ameba
- 测试
在Realtek Audio Shield上的按钮用于唤醒Ameba,我们将它按着,讲话,然后放开,Ameba就会将语音资料上传到云端,云端会回传语音回应至Ameba,Ameba再将它播放。
请参考底下影片的示范:
程式碼說明
- 程式码
- setup_alexa()
在 setup_alexa() 这个函式里,设定了所有Alexa需要的资讯
Alexa.setAvsClientId(avs_client_id,sizeof(avs_client_id)-1);
设定Client ID,Client ID的值是使用者申请Alexa APP时取得
Alexa.setAvsClientSecret(avs_client_secret, sizeof(avs_client_secret)-1);
设定 Client Secret,Client Secret的值是使用者申请Alexa APP时取得
Alexa. setAvsRefreshToken (avs_refresh_token, sizeof(avs_refresh_token)-1 );
设定储存Refresh token。当初次设定完成之后,会呼叫这个函式将Refresh token存在 Flash memory里
Alexa.setAvsHttp2Host(avs_http2_host, sizeof(avs_http2_host)-1);
设定提供AVS语音服务的网站。 Amazon目前提供的是基于HTTP2的语音服务。不同语系使用的网站不同
Alexa.begin();
最后启始AVS语音服务功能
- loop()
在loop()函式里,只要持续检查网路状态即可,如有异常则进行网路重连
void loop() {
  if (WiFi.status() != WL_CONNECTED) {
      while (WiFi.begin(ssid, pass) != WL_CONNECTED)
      {
        delay(1000);
      }
      Serial.println("Connected to wifi");
  }
	delay(100);
}
- Log说明
这小节针对Serial Monitor的log做个说明,底下是已经注册过Alexa的Ameba的完整log,我们一一说明
Interface 0 IP address : 192.168.88.32Connected to wifi

[HTTPD] httpd_server_thread started
init mdns
SGTL5000 CHIP ID:0xA011

[HTTPC] Use ciphersuite TLS-ECDHE-RSA-WITH-AES-128-GCM-SHA256

version=[HTTP/1.1]

status=[200 OK]

content_type=[application/json]

content_lenght=1233
[14316] update access_token:Atza|IwEBIJYyUjyCv8luvwAI7TQyL-j
[14333] update refresh_token:Atzr|IwEBIIW2_8KvJd9qake23w12WQT
[15664] connecting...
[24210] handshake done
[24239] C->S HEADERS
        :method: GET
        :path: /v20160207/directives
        :scheme: https
        :authority: avs-alexa-na.amazon.com:443
        accept: */*
        authorization: Bearer Atza|IwEBIJYyUjyCv8luvwAI
[24308] C->S HEADERS
        :method: POST
        :path: /v20160207/events
        :scheme: https
        :authority: avs-alexa-na.amazon.com:443
        accept: */*
        authorization: Bearer Atza|IwEBIJYyUjyCv8luvwAI
        content-type: multipart/form-data; boundary=bo
[24546] CS HEADERS
        :method: POST
        :path: /v20160207/events
        :scheme: https
        :authority: avs-alexa-na.amazon.com:443
        accept: */*
        authorization: Bearer Atza|IwEBIJYyUjyCv8luvwAI
        content-type: multipart/form-data; boundary=bo
[33363] upload audio................................
[36861] C<-S HEADERS
        :status: 200
        access-control-allow-origin: *
        x-amzn-requestid: 0ed21ffffef23a7d-000069fb-00025786-cd4862c89753e4bd-3736a86a-5
        content-type: multipart/related;boundary=36697d04-4d4e-4595-b6e6-a390edd0295a;start=metadata.1494256392289;type="application/json"
[37551] json: {"directive":{"header":{"namespace":"Speaker","name":"SetMute","messageId":"664d09e5-d664-4948-bbac-c70e08a1424d","dialogRequestId":"64567a10-0a67-48e6-8d66-4a936508f032"},"payload":{"mute":false}}}
[37606] json: {"directive":{"header":{"namespace":"SpeechSynthesizer","name":"Speak","messageId":"fe57a3bb-2280-4d88-9345-529e51cc30f2","dialogRequestId":"64567a10-0a67-48e6-8d66-4a936508f032"},"payload":{"url":"cid:DeviceTTSRenderer_0ae4a760-fee0-407a-b8d1-e5922c967805_1092807486","format":"AUDIO_MPEG","token":"amzn1.as-ct.v1.Domain:Application:Notifications#ACRI#DeviceTTSRenderer_0ae4a760-fee0-407a-b8d1-e5922c967805"}}}
[37718] download mp3.......
(3096)
- 連上Alexa
接着要尝试连上Alexa基于HTTP2提供的语音服务。从connecting到收送第一笔http资料不可以超过10秒,超过的话会被Amazon踢掉,并且要尝试重连。
以底下为例,我们在15.664秒时尝试连线,在24.210秒完成SSL交握,并在24.239秒送出HTTP封包,在24.546秒时收到Amazon回传的HTTP封包
[15664] connecting...
[24210] handshake done
[24239] C->S HEADERS
        :method: GET
        :path: /v20160207/directives
        :scheme: https
        :authority: avs-alexa-na.amazon.com:443
        accept: */*
        authorization: Bearer Atza|IwEBIJYyUjyCv8luvwAI
[24308] C->S HEADERS
        :method: POST
        :path: /v20160207/events
        :scheme: https
        :authority: avs-alexa-na.amazon.com:443
        accept: */*
        authorization: Bearer Atza|IwEBIJYyUjyCv8luvwAI
        content-type: multipart/form-data; boundary=bo
[24546] C<-S HEADERS
        :status: 200
        access-control-allow-origin: *
        x-amzn-requestid: 0ed21ffffef23a7d-000069fb-00025786-cd4862c89753e4bd-3736a86a-1
        content-type: multipart/related; boundary=------abcde123; type=application/json
[25716] C<-S HEADERS
        :status: 204
        access-control-allow-origin: *
        x-amzn-requestid: 0ed21ffffef23a7d-000069fb-00025786-cd4862c89753e4bd-3736a86a-3
- 上传与下载语音
底下的log会出现在使用者按下按钮开使录音,同时Ameba会将资料上传至Amazon。每上传一小块资料便会印一个逗号 “.”
[33295] C->S HEADERS
        :method: POST
        :path: /v20160207/events
        :scheme: https
        :authority: avs-alexa-na.amazon.com:443
        accept: */*
        authorization: Bearer Atza|IwEBIJYyUjyCv8luvwAI
        content-type: multipart/form-data; boundary=bo
[33363] upload audio................................
上传完之后,可能会等一会儿,才会收到语音回应的内容
语音内容是边下载边播放,每下载一小块资料也会印一个逗号 “.”。
我们不需要等到语音完全下载完才播放。以这份log为例, “(3096)” 代表从使用者放开按钮直到听到语音回音的时间是3.096秒,这个时间越短代表使用者感受到的延迟越短。
[36861] C<-S HEADERS
        :status: 200
        access-control-allow-origin: *
        x-amzn-requestid: 0ed21ffffef23a7d-000069fb-00025786-cd4862c89753e4bd-3736a86a-5
        content-type: multipart/related;boundary=36697d04-4d4e-4595-b6e6-a390edd0295a;start=metadata.1494256392289;type="application/json"
[37551] json: {"directive":{"header":{"namespace":"Speaker","name":"SetMute","messageId":"664d09e5-d664-4948-bbac-c70e08a1424d","dialogRequestId":"64567a10-0a67-48e6-8d66-4a936508f032"},"payload":{"mute":false}}}
[37606] json: {"directive":{"header":{"namespace":"SpeechSynthesizer","name":"Speak","messageId":"fe57a3bb-2280-4d88-9345-529e51cc30f2","dialogRequestId":"64567a10-0a67-48e6-8d66-4a936508f032"},"payload":{"url":"cid:DeviceTTSRenderer_0ae4a760-fee0-407a-b8d1-e5922c967805_1092807486","format":"AUDIO_MPEG","token":"amzn1.as-ct.v1.Domain:Application:Notifications#ACRI#DeviceTTSRenderer_0ae4a760-fee0-407a-b8d1-e5922c967805"}}}
[37718] download mp3.......
(3096)
