• 在https://github.com/ambiot/ambd_arduino/tree/master/Arduino_zip_libraries 下载Ameba客制版TensorFlow Lite。
• 从 Arduino IDE Library 下载“Arduino_LSM9DS1.h”库:
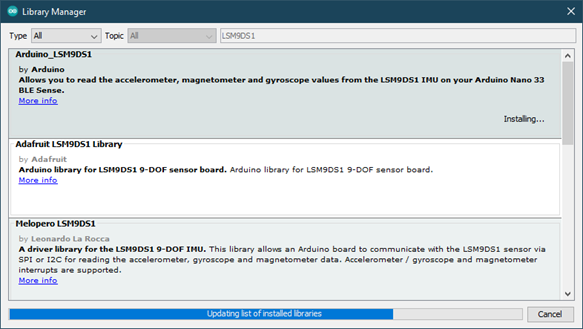
• 按照https://www.arduino.cc/en/guide/libraries 中的说明进行安装。
• 确保在 https://github.com/ambiot/ambd_arduino/tree/master/Ameba_misc/ 中找到patch文件
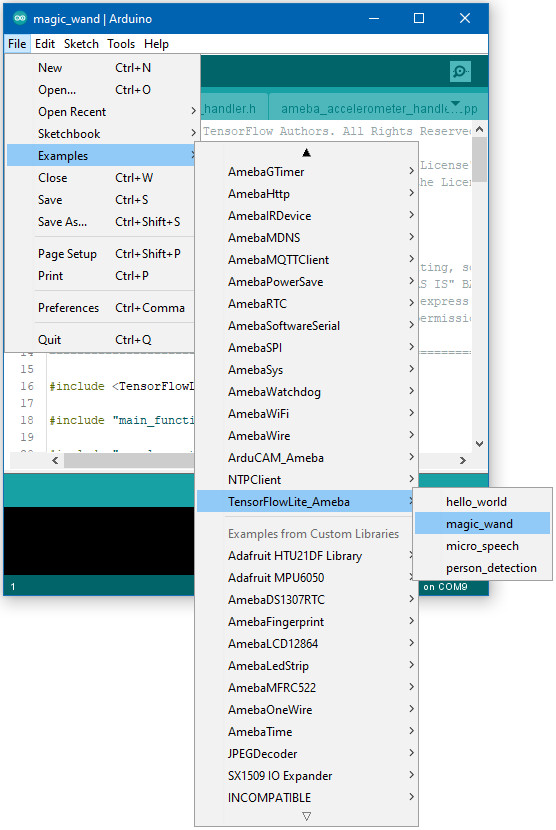
打开范例,“Files”→“Examples”→“TensorFlowLite_Ameba”→“magic_wand”。
上传代码并在上传完成后按Ameba上的重置按钮。
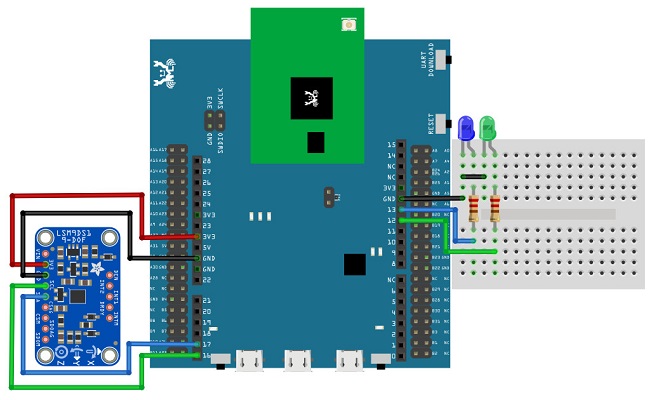
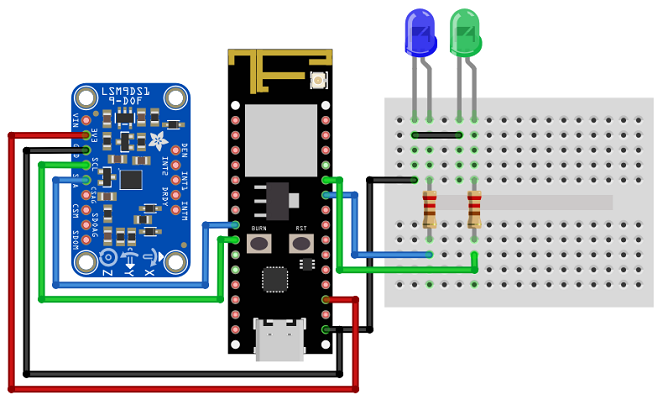
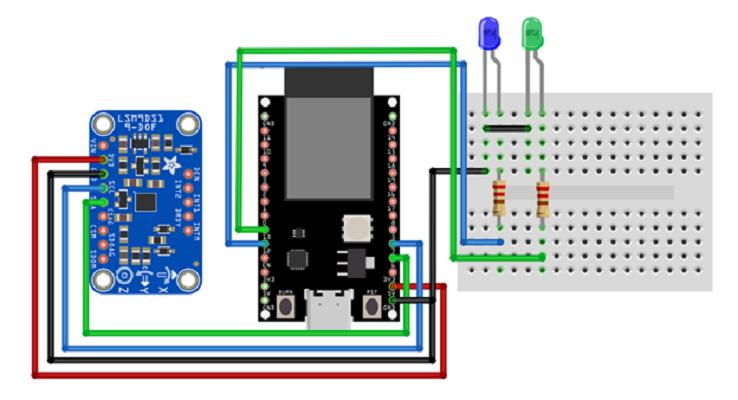
保持加速感测器稳定,使x轴的正极指向右侧,z轴的正极指向上方,按照所示形状移动加速感测器,使其平稳运动1至2秒钟,避免剧烈运动。
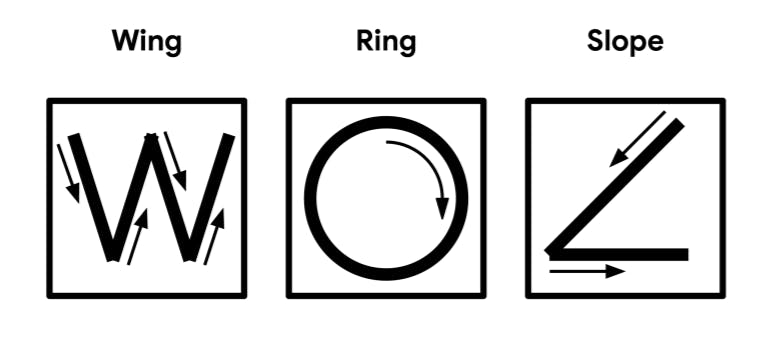
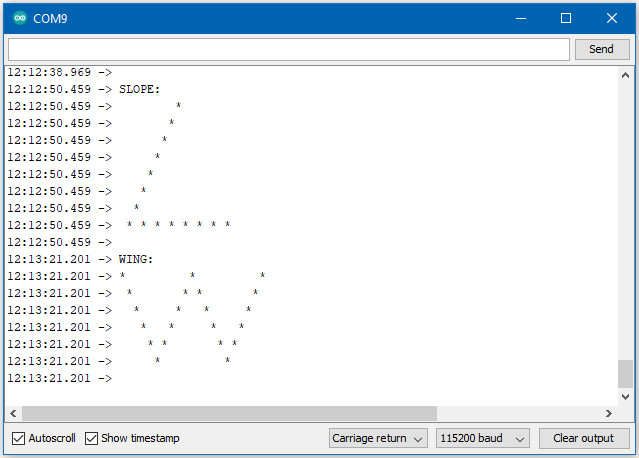
如果Tensorflow Lite模型可以识别移动,则应该看到相同形状的输出到Arduino串行监视器。对应于不同的识别手势,不同的LED将亮起。
请注意,机翼形状易于实现,而坡度和环形形状则更难于正确定位。
程式码说明
有关TensorFlow Lite for Microcontrollers的更多信息,请参考以下网址: https://www.tensorflow.org/lite/microcontrollers
