Materials
- Ameba RTL8710 Board x 2
- Dragino LoRa Shield x 2
Example
Dragino Lora Shield is a long range transceiver and based on Open source library. It allows the user to send data and reach extremely long ranges at low data-rates.It provides ultra-long range spread spectrum communication and high interference immunity whilst minimising current consumption. Due to different frequency regulations on each country, please notice the frquency LoRa Shield used when you purchase it.
Download the LoRa Library:
https://github.com/Ameba8195/Arduino/blob/master/libraries/AmebaLoRa.zip
Refer to the documentation on Arduino website to install library and add the .zip file to Ameba:
https://www.arduino.cc/en/Guide/Libraries#toc4
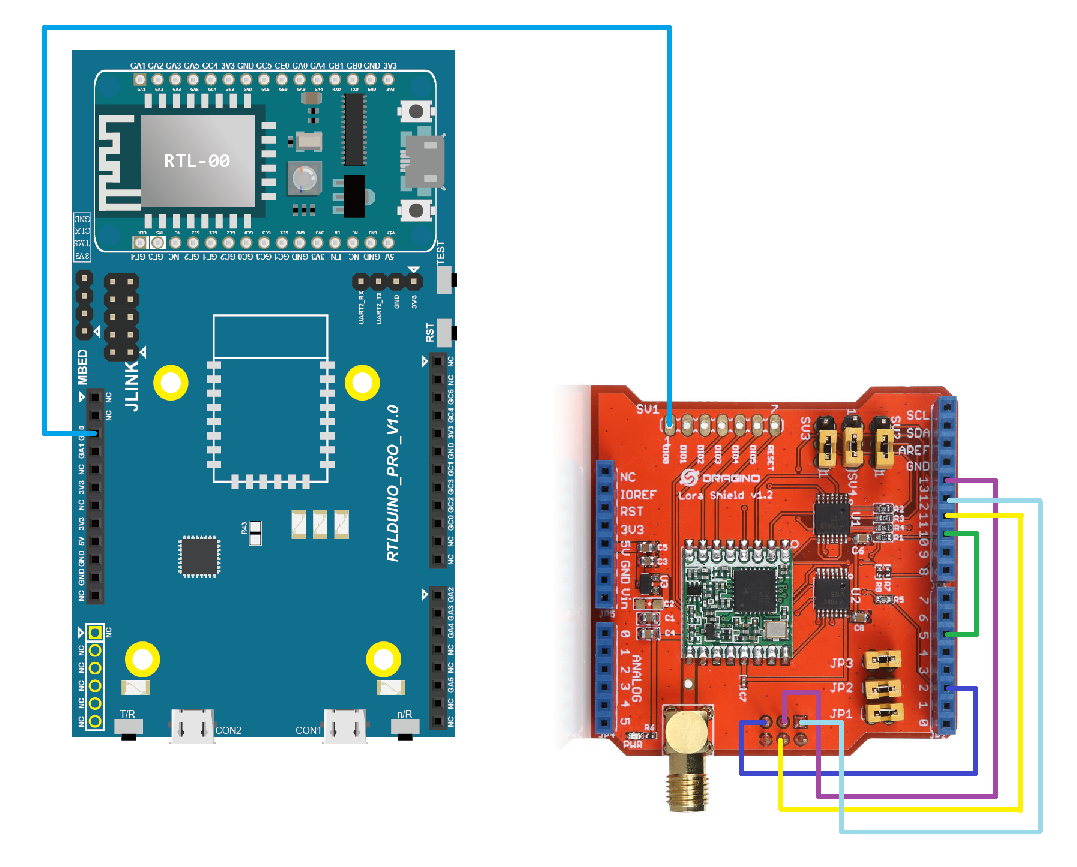
Dragino LoRa Shield SPI example wiring explanation:
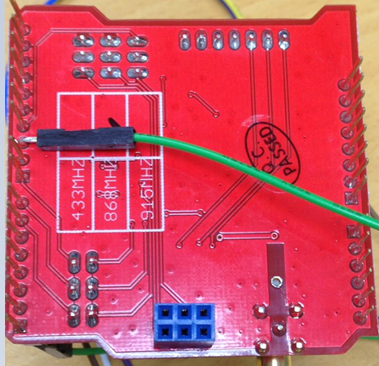
Dragino LoRa Shield can be embedded on Ameba RTL8710 board directly, but the Ameba RTL8710 CS pin is different to the standard SPI protocol. Therefore, Dragino LoRa Shield CS pin cannot connect to Ameba RTL8710 CS pin directly. Modify and pull the CS pin which is pin 10 toward inside and connect to pin 5 with dupont line on Dragino LoRa Shield. The example is shown below:
Dragino LoRa Shield SPI Data is produced from ICSP SPI BUS, then connect to AMEBA SPI pin as follows:
- Example Illustration
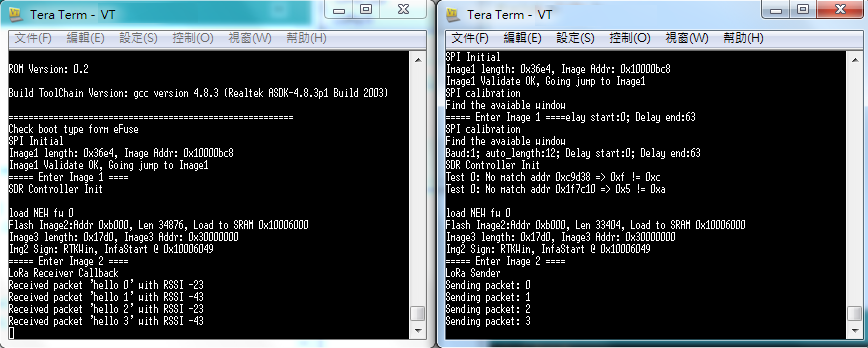
This example uses send and receive code to do the functional verification for two Dragino LoRa Shield. One is for sender and another one is fr receiver. Open “File” -> “Examples” -> “AmebaLoRa” -> “LoRaSender” and LoRaReceiverCallback. Compile them separately and upload to Ameba, push the Reset button. Then you can see the results on the terminal:
Code Reference
The program uses begin() method to initialize LoRa class when it enters setup(). The parameter 915E6 is related to its RF, we don’t make changes here.
LoRa.begin(915E6);
LoRaSender sender:
Enter loop(), receiver calls beginPacket() method and enter transmission procedure. And using print(“hello ”) method can make LoRa send hello string parameter. Last, it calls endPacket() method to finish the sending procedure.
LoRa.beginPacket();
LoRa.print("hello ");
LoRa.print(counter);
LoRa.endPacket();
LoRaReceiverCallback receiver:
The example of receiver uses onReceive callback to receice the messages from sender. In setup(), using onReceive(void * cbfunction) method to trigger the registered cbfunction after finishing begin() method.
LoRa.onReceive(onReceive);
LoRa.receive();
Then, using receive() method to enter the LoRa receive mode
The registered callback function is named as onReceive in the “onReceive” example, and it holds the parameter “packetSize” when it is triggered.
void onReceive(int packetSize) {
  // received a packet
  Serial.print("Received packet '");
  // read packet
  for (int i = 0; i < packetSize; i++) {
    Serial.print((char)LoRa.read());
  }
  // print RSSI of packet
  Serial.print("' with RSSI ");
  Serial.println(LoRa.packetRssi());
}
Calling read() method to read the received bytes. This example uses loop to print out strings for its received bytes size in sequence:
  for (int i = 0; i < packetSize; i++) {
    Serial.print((char)LoRa.read());
  }
Using packetRssi() method can get the value of current RSSI
Serial.println(LoRa.packetRssi());