Materials
- Ameba x 1
- Antenna x 1
Example
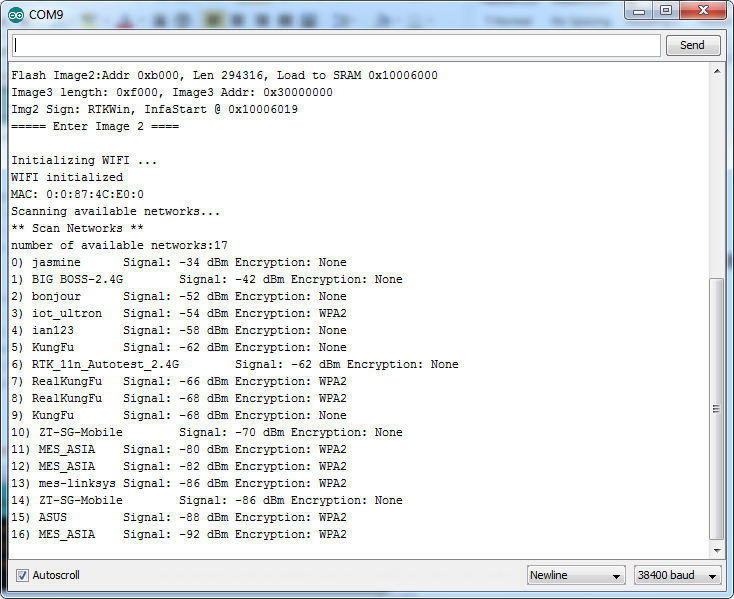
In this example, we use Ameba to scan available WiFi hotspots in the surroundings, and prints the SSID, encryption type, signal strngth information of each detected hotspot.
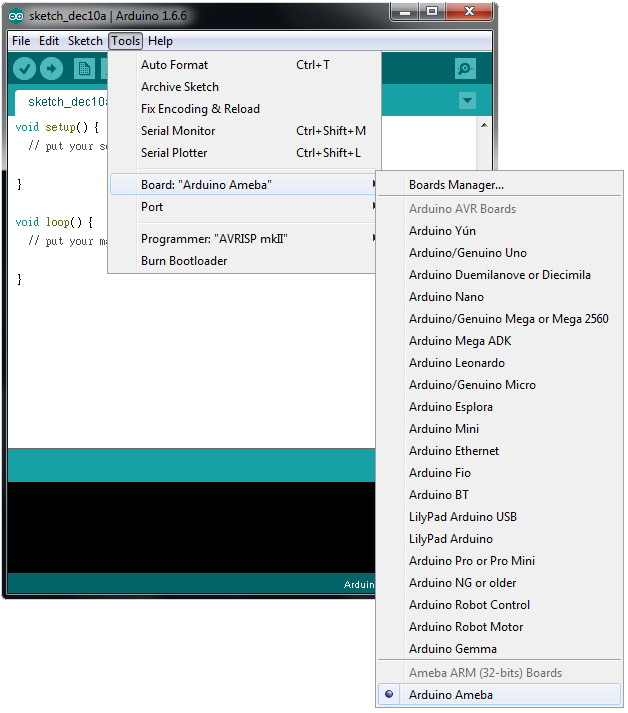
First, make sure Ameba is selected in Arduino IDE: “Tools” -> “Board” -> “Arduino Ameba”
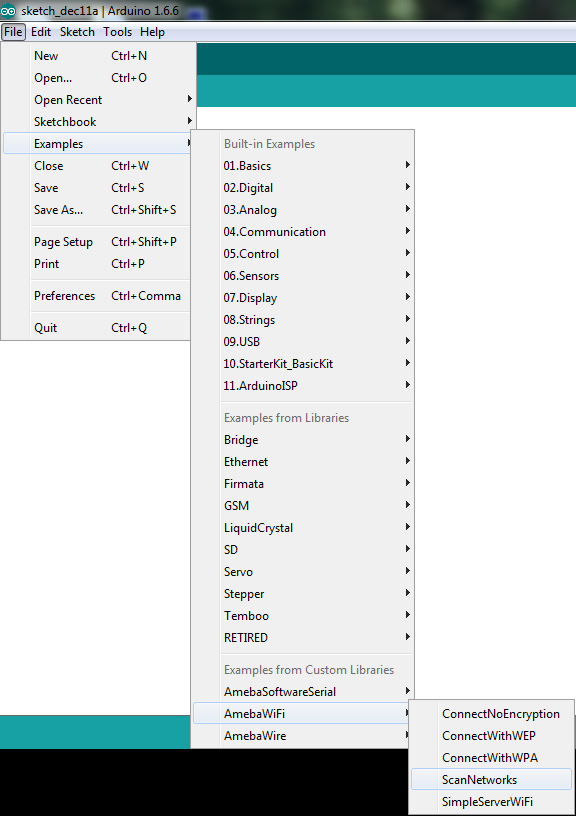
Open the “ScanNetworks” example in “File” -> “Examples” -> “AmebaWiFi” -> “ScanNetworks”:
Then upload the sample code, and press the reset button on Ameba. Afterwards, you can see “**Scan Networks**” message appears, with the detected WiFi hotspots and the information of each hotspot.
Code Reference
https://www.arduino.cc/en/Reference/WiFiMACAddress
Then we use WiFi.scanNetworks() to detect WiFi hotspots:
https://www.arduino.cc/en/Reference/WiFiScanNetworks
To get information of detected WiFi hotspot:
We use WiFi.SSID(thisNet) to retrieve SSID of a network:
https://www.arduino.cc/en/Reference/WiFiSSID
We use WiFi.RSSI(thisNet) to get the signal strength of the connection to the router:
https://www.arduino.cc/en/Reference/WiFiRSSI
We use WiFi.encryptionType(thisNet) to get the encryption type of the network:
https://www.arduino.cc/en/Reference/WiFiEncryptionType
Comparison with Arduino
In the Arduino platform, we need to add an extra WiFi shield to be the WiFi module to realize the WiFi connection. And we have to #include to use SPI to communicate with WiFi module. However, Ameba is already equipped with WiFi module. Therefore, #include is not needed.
