• Download the Ameba customized version of TensorFlow Lite for the Microcontrollers library at https://github.com/ambiot/ambd_arduino/tree/master/Arduino_zip_libraries.
• Download “Arduino_LSM9DS1.h” library from Arduino IDE Library Manger:
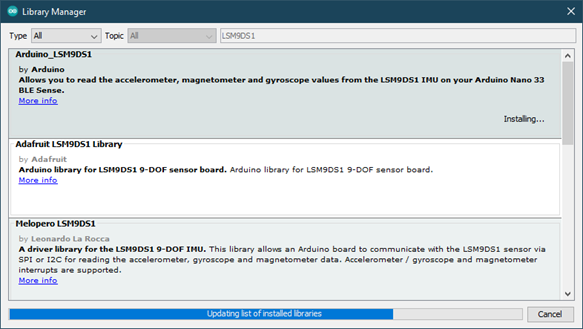
• Follow the instructions at https://www.arduino.cc/en/guide/libraries to install it.
• Ensure that the patch files found at https://github.com/ambiot/ambd_arduino/tree/master/Ameba_misc/
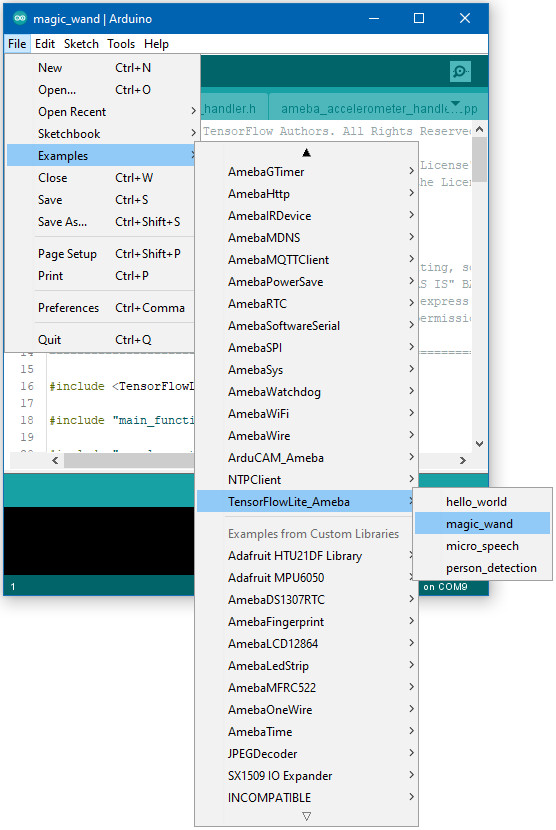
Open the example, “Files” → “Examples” → “TensorFlowLite_Ameba” → “magic_wand”.
Upload the code and press the reset button on Ameba board once the upload has completed.
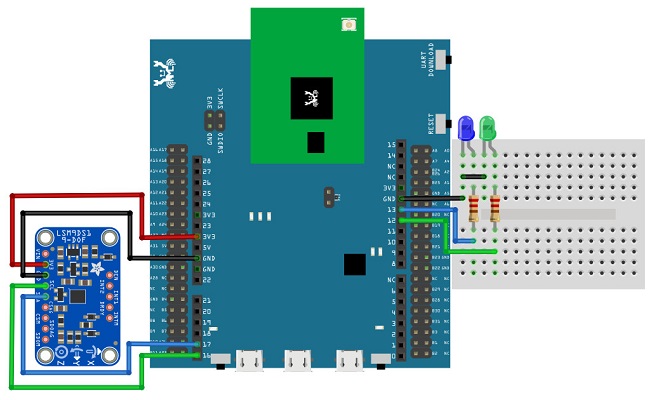
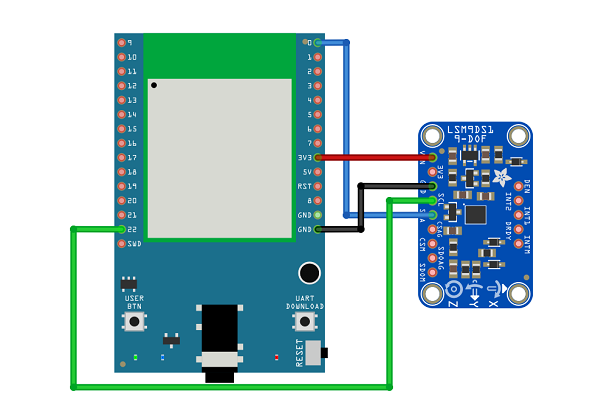
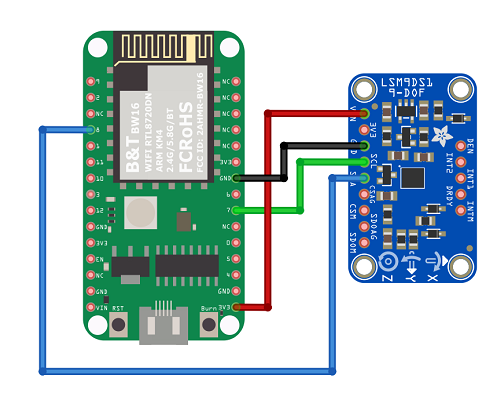
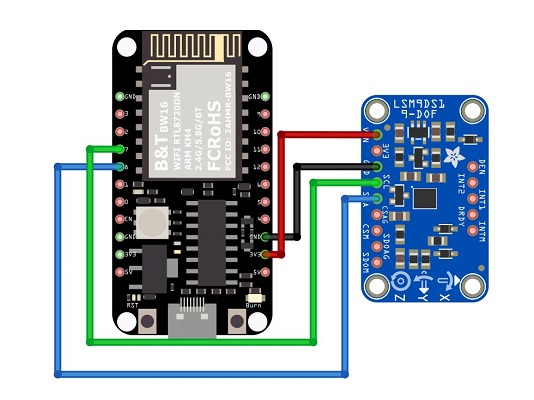
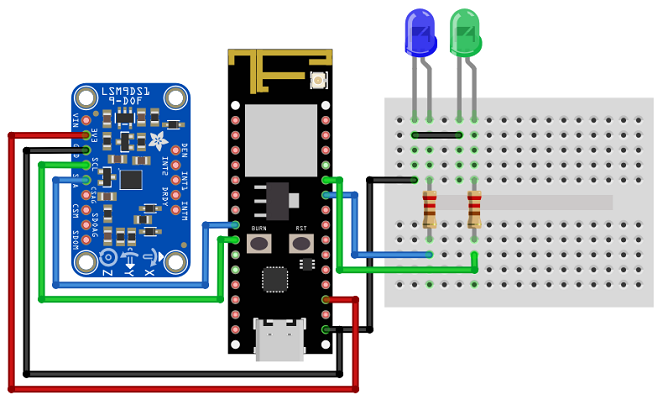
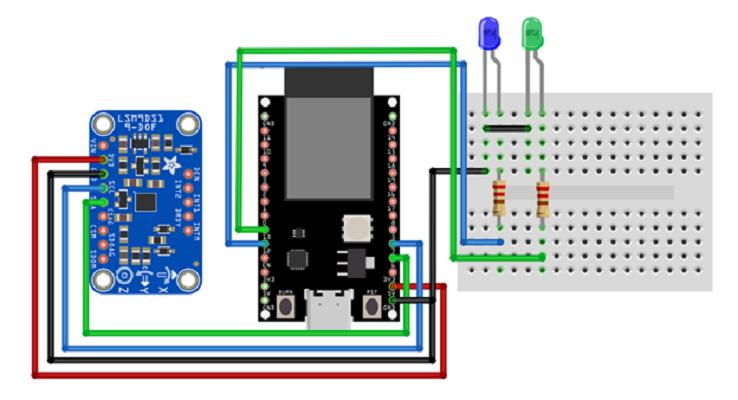
Holding the Accelerometer steady, with the position x-axis pointing to the right and the positive z-axis pointing upwards, move it following the shapes as shown, moving it in a smooth motion over 1 to 2 seconds, avoiding any sharp movements.
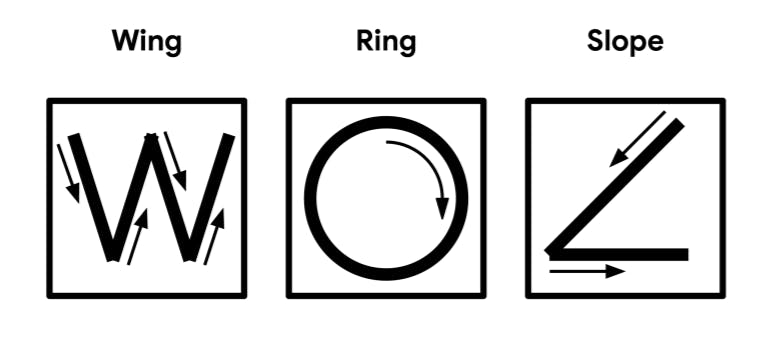
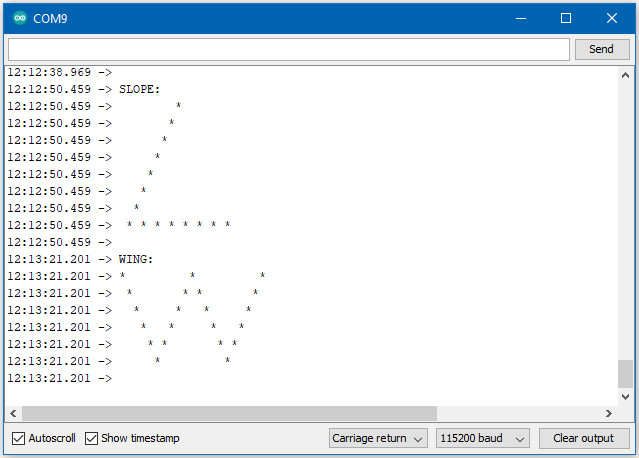
If the movement is recognised by the Tensorflow Lite model, you should see the same shape output to the Arduino serial monitor. Different LEDs will light up corresponding to different recognized gestures.
Note that the wing shape is easy to achieve, while the slope and ring shapes tend to be harder to get right.
Code Reference
More information on TensorFlow Lite for Microcontrollers can be found at: https://www.tensorflow.org/lite/microcontrollers
