Materials
• AmebaD [RTL8722DM/ RTL8722CSM/ RTL8722DM MINI] x 1
• Microsoft Azure account
Example
Microsoft Azure IoT is a cloud service, as described in the official website: Rely on Microsoft Azure IoT Hub to easily and securely connect your Internet of Things (IoT) assets. Use device-to-cloud telemetry data to understand the state of your devices and assets and be ready to take action when a device needs your attention.
Azure IoT Hub offers sending commands and notifications via cloud-to-device messages reliably. In cloud-to-device messages, reliably send commands and notifications to your connected devices – and track message delivery with acknowledgement receipts. Device messages are sent in a durable way to accommodate intermittently connected devices.(From https://azure.microsoft.com/zh-tw/services/iot-hub/ ).
• Create an Azure account to use Microsoft Azure. You can find login and registration information here: https://azure.microsoft.com/en-us/.
• Login to Azure portal https://portal.azure.com/#home.
• From the Azure homepage, create an IoT hub:
1. Select the + Create a resource button, and then search and choose IoT Hub in Search the Marketplace field.
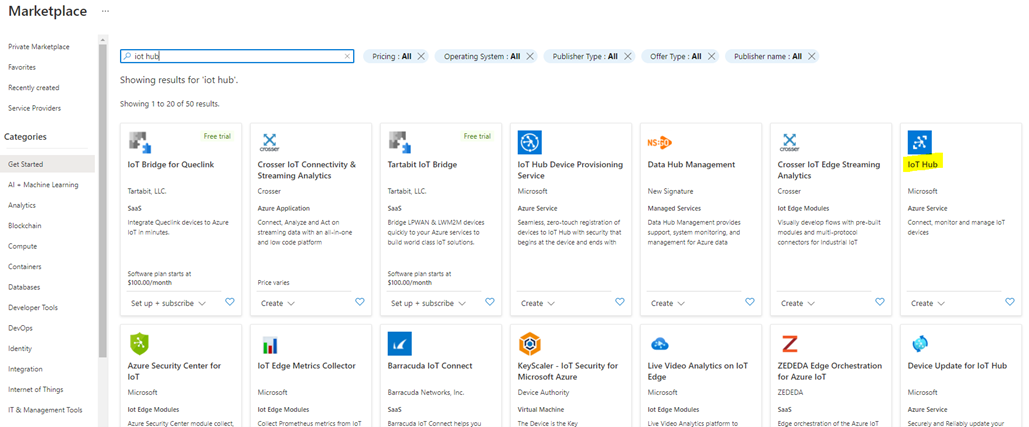
2. Select IoT hub and then select Create.
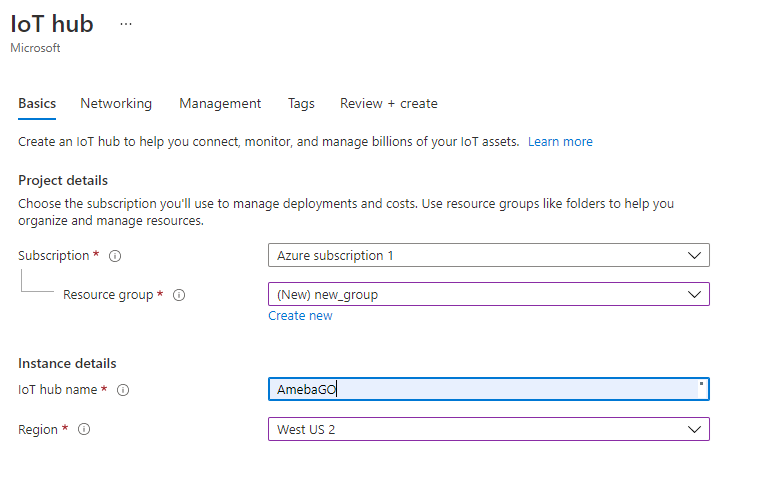
3. On the Basics tab, fill in the fields as below:
– Subscription: Select a subscription to use for your hub.
– Resource Group: Select a group or create a new one if you don’t have any existed group. To create a new one, click Create new and fill in the group name.
– Region: Select the location closest to you.
– IoT Hub Name: Enter the name for your hub. Here we use “AmebaGO” as our hub name.
4. Then select Create to create a new IoT hub. The deployment process may take a few minutes while the hub is being created. Once the deployment finished, click Go to resource to open the hub.
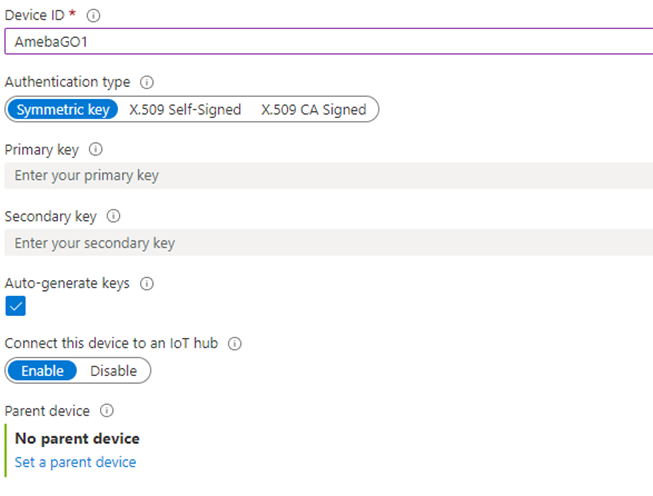
• After creating a hub, we need to register a new device in the IoT hub. Select and go to your IoT hub, in the left side navigation menu, select IoT devices then click Add Device.
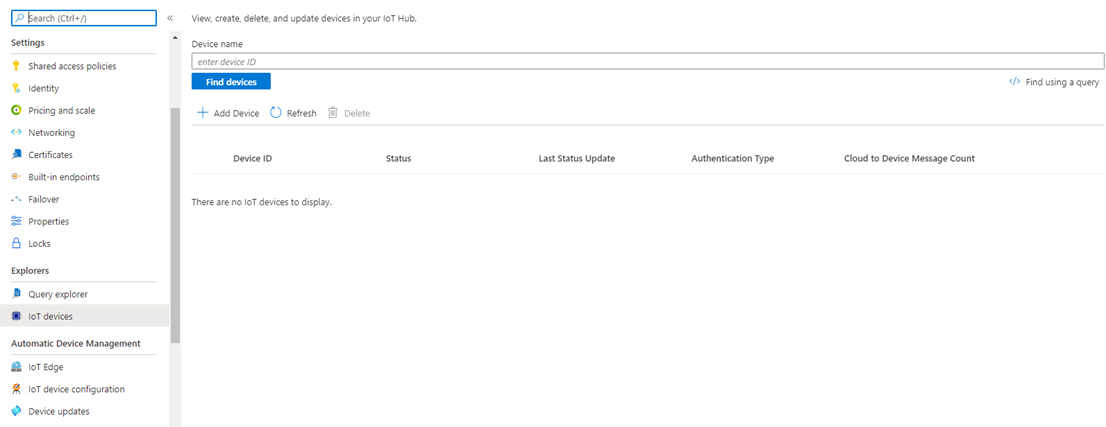
• Here we name the new device as “AmebaGO1” in the Device ID field. Choose “Symmetric key” for Authentication type and tick Auto-generate keys to automatically generate primary and secondary keys.
• Then we need to create an Arduino library for the Azure SDK for Embedded C by using the following PowerShell commands:
PS C:\> Invoke-WebRequest -Uri https://raw.githubusercontent.com/Azure/azure-sdk-for-c/main/sdk/samples/iot/aziot_realtek_amebaD/New-ArduinoZipLibrary.ps1 -OutFile New-ArduinoZipLibrary.ps1

PS C:\> .\New-ArduinoZipLibrary.ps1
Note: if the execution is restricted by default for security reasons, run PowerShell as Administrator and run the following command:
Set-ExecutionPolicy Unrestricted
• Then open Arduino IDE and install the Azure SDK for Embedded C zip library: go to Sketch -> Include Library -> Add .zip Library…, then select azure-sdk-for-c.zip that we created in previous step, and click OK.
• Now clone the Azure SDK for Embedded C (https://github.com/Azure/azure-sdk-for-c) repository locally.
• Then generate the ca.h header in the local Realtek AmebaD sample folder by entering the following commands in PowerShell:
cd /sdk/samples/iot/aziot_realtek_amebaD

.\New-TrustedCertHeader.ps1
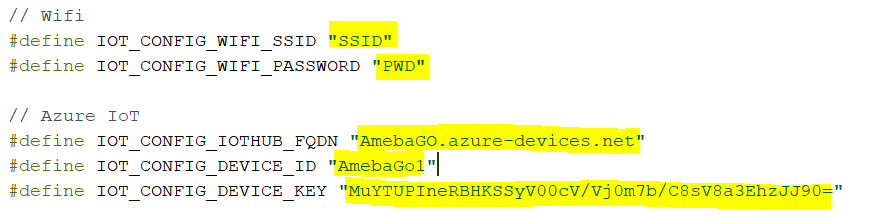
• Now open the Realtek AmebaD sample from the local clone on Arduino IDE. Edit iot_configs.h by entering your own information:
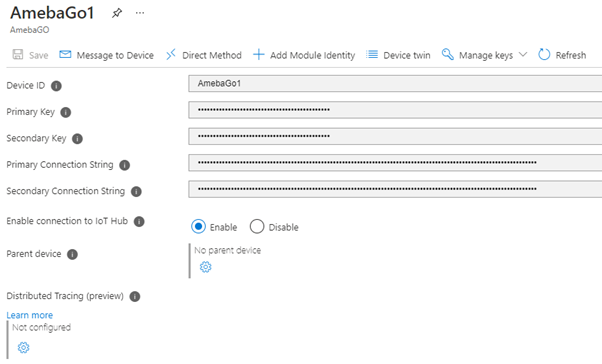
You can fill in your own WiFi SSID and password, host name, device ID and your own device key. You can find the device information including the device key by clicking the name of the device in the IoT hub. Then save the file.
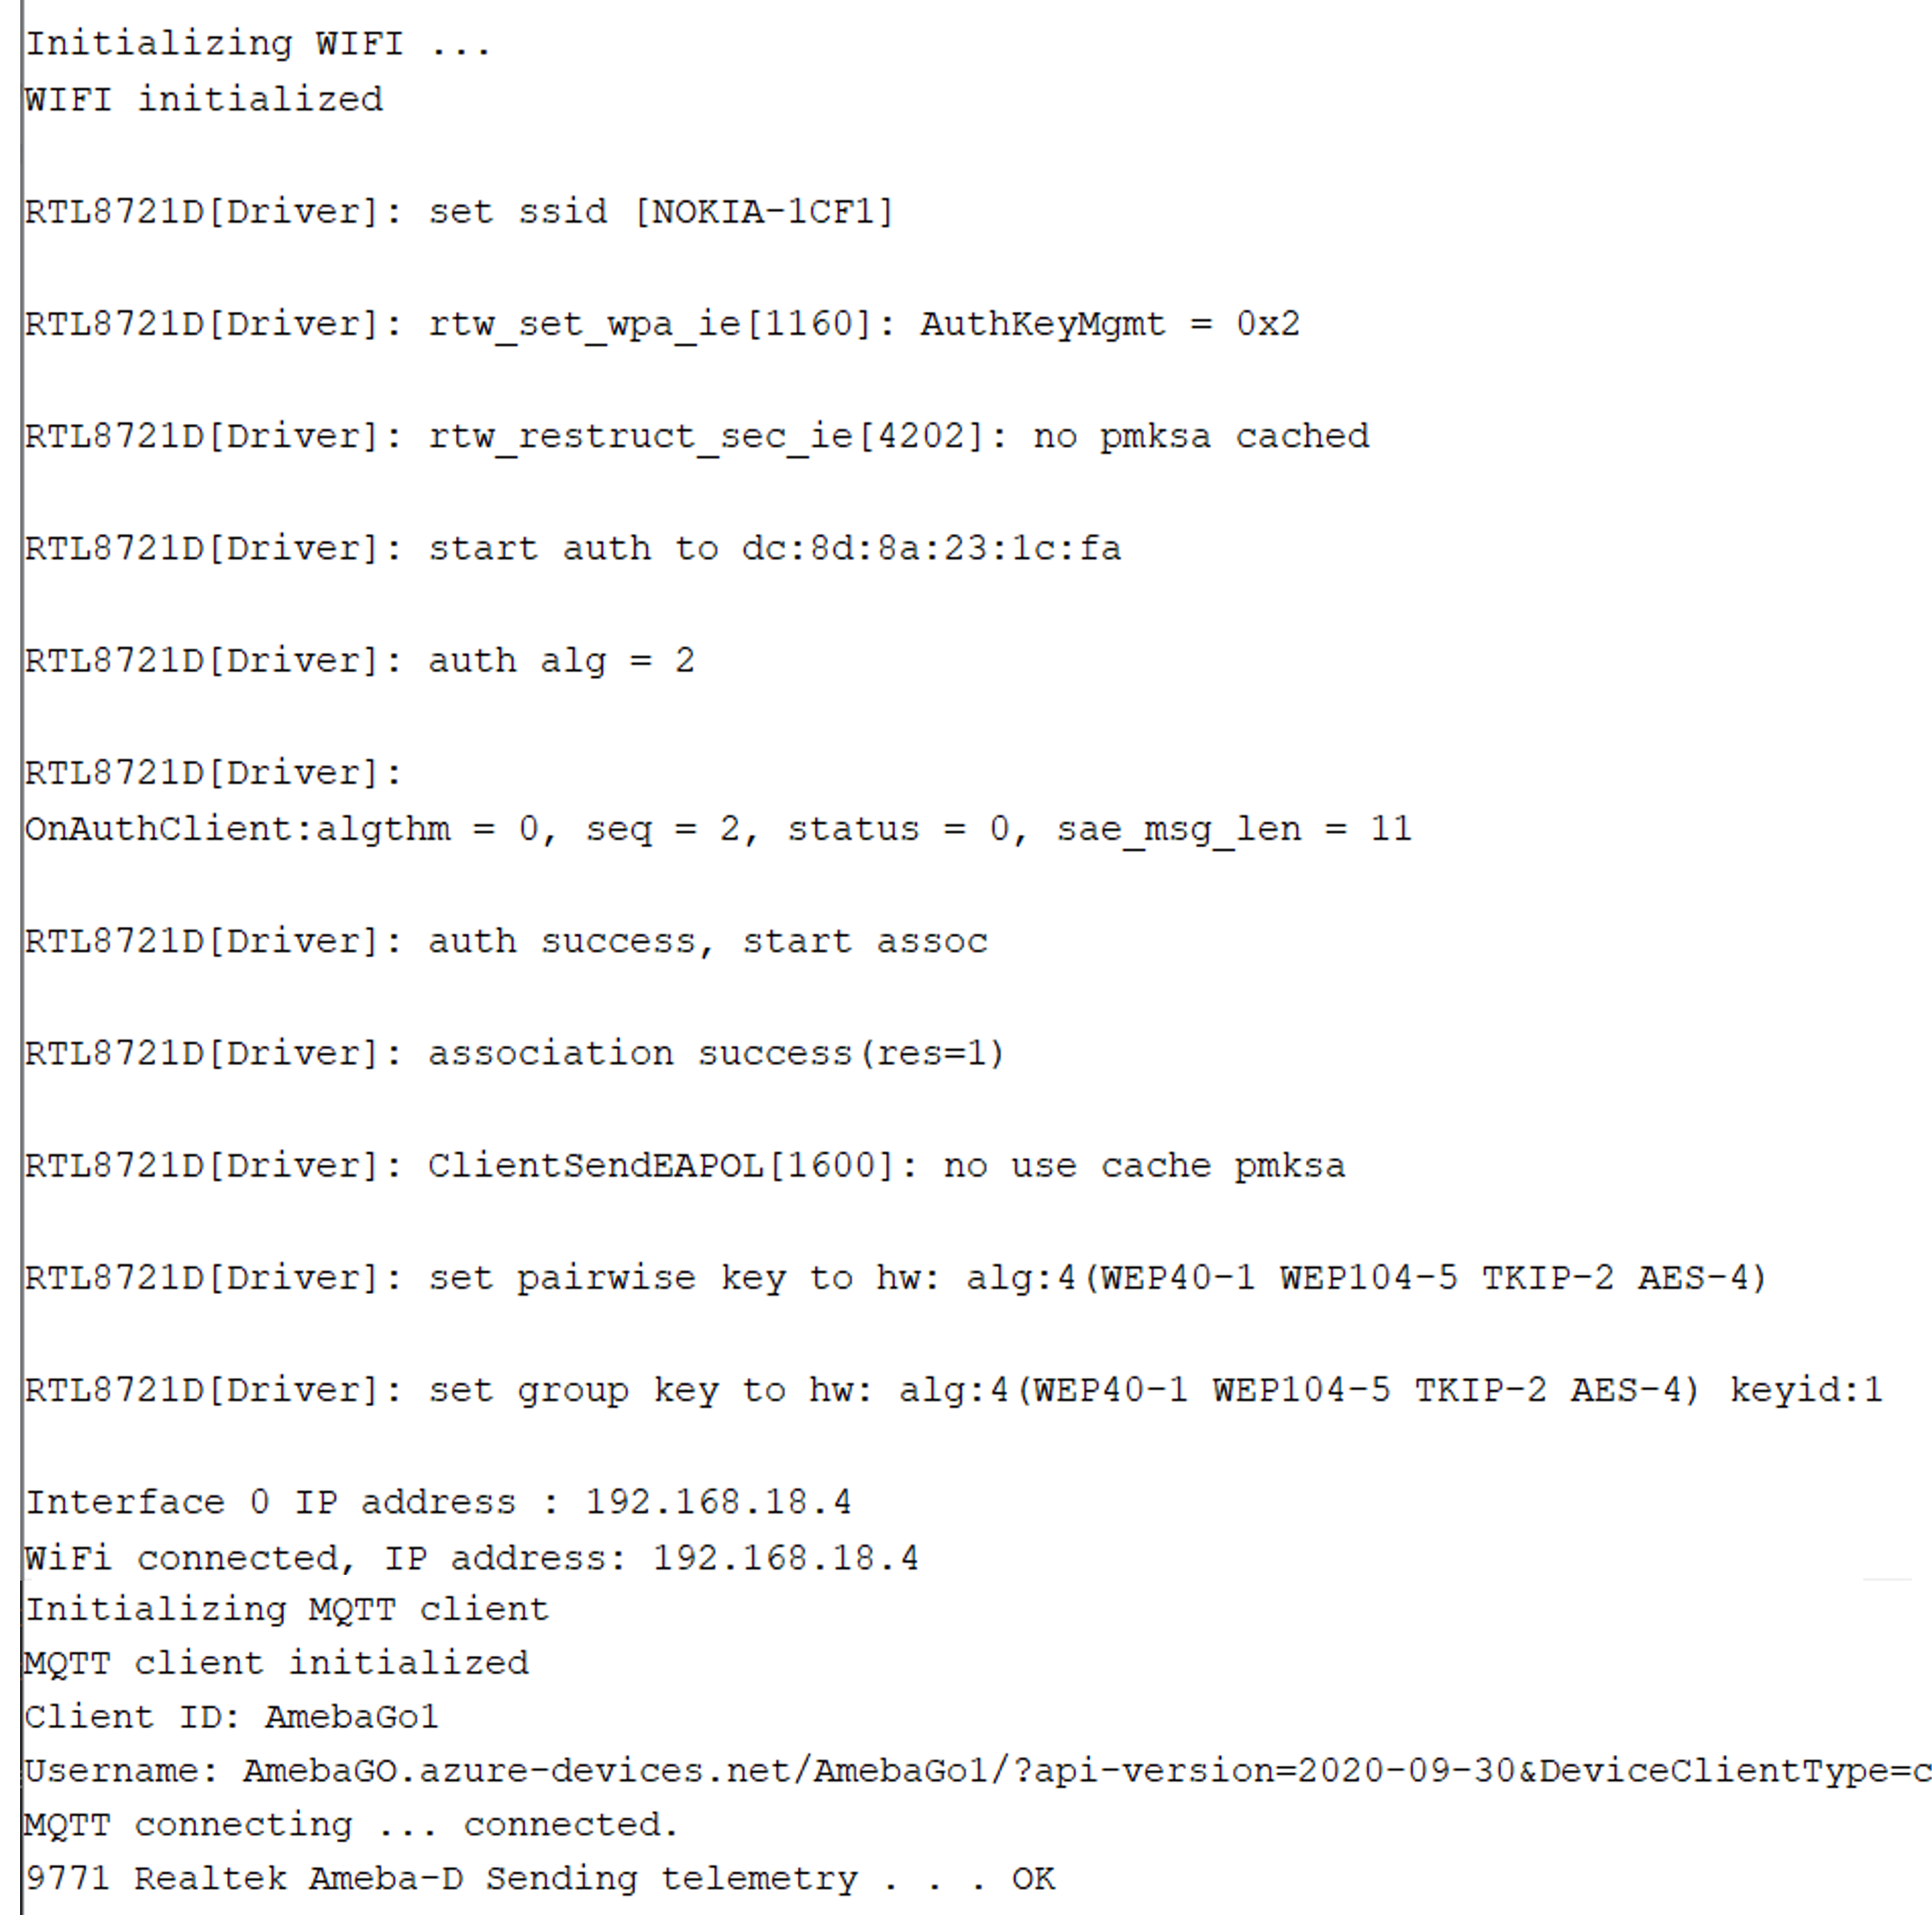
• Compile and upload the example to Ameba RTL8722DM, click the reset button and open the serial monitor to check out the results. You should be able to see the following display.