Materials
- AmebaPro2 [ AMB82 MINI ] x 1
- SD Card x 1
- Button x 1
- Green LED x 1
- Red LED x 1
- 220 Ohm resistor x 2
- 10K Ohm resistor x 1
Example
Introduction
In this example, we will be using Ameba Pro2 development board to create a simple surveillance system with Face Recognition that will take a snapshot of unrecognized faces and save it as JPEG on an SD Card.
Procedure
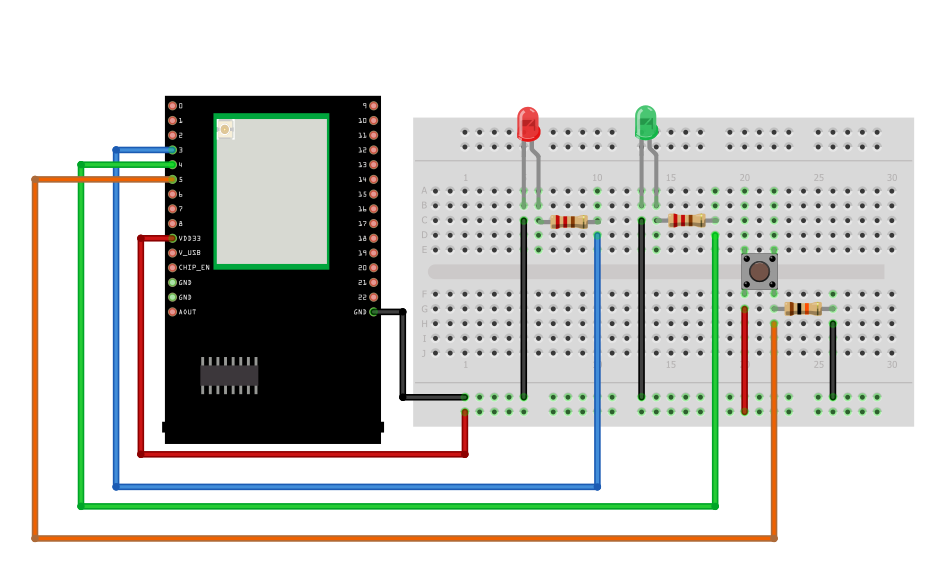
AMB82 MINI wiring diagram:
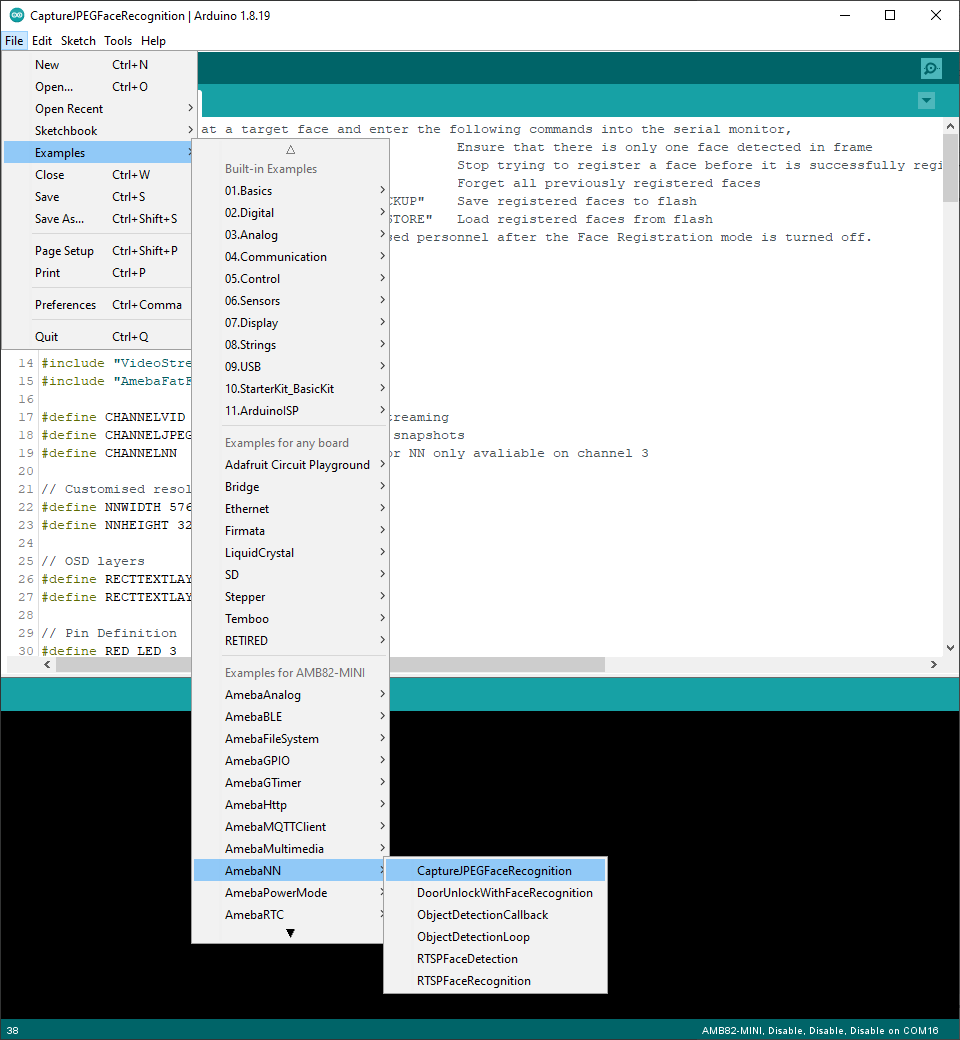
Open the Neural Network example in “File” -> “Examples” -> “AmebaNN” -> “CaptureJPEGFaceRecognition”.
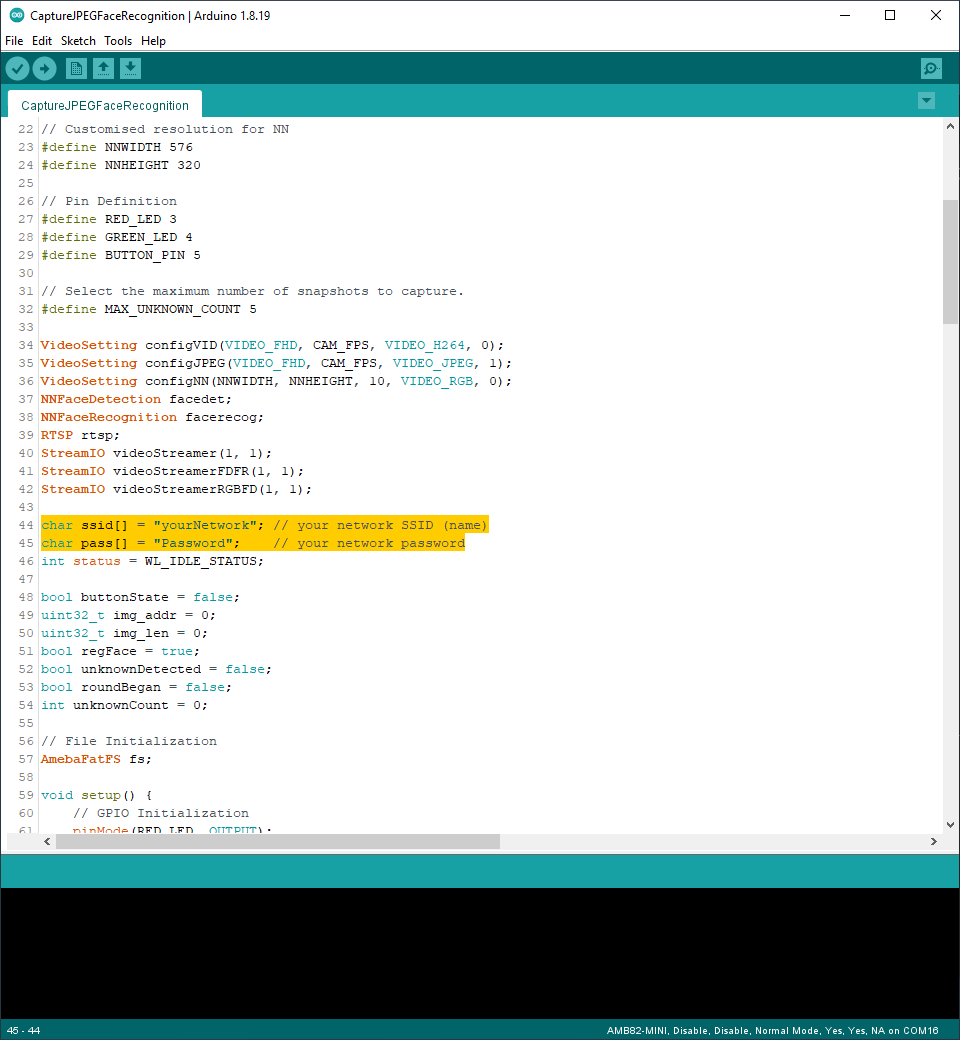
In the highlighted code snippet, fill in the “ssid” with your WiFi network SSID and “pass” with the network password.
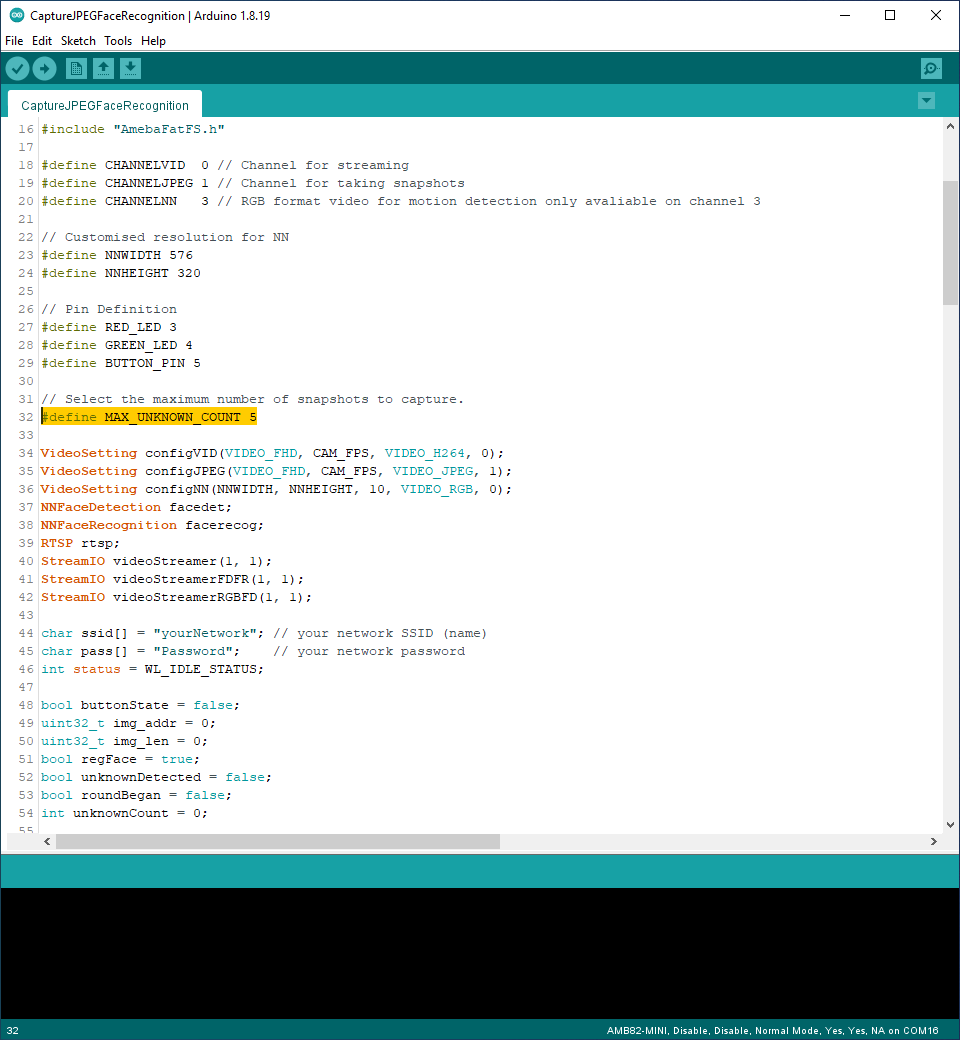
You may also set the maximum number of snapshots to be captured by changing the value highlighted in yellow. Currently, the value is set to 5, therefore only 5 snapshots will be taken in total and saved into SD card. No more snapshots will be taken after 5, even if an unrecognized person is detected. Increase the value of MAX_UNKNOWN_COUNT to take more snapshots.
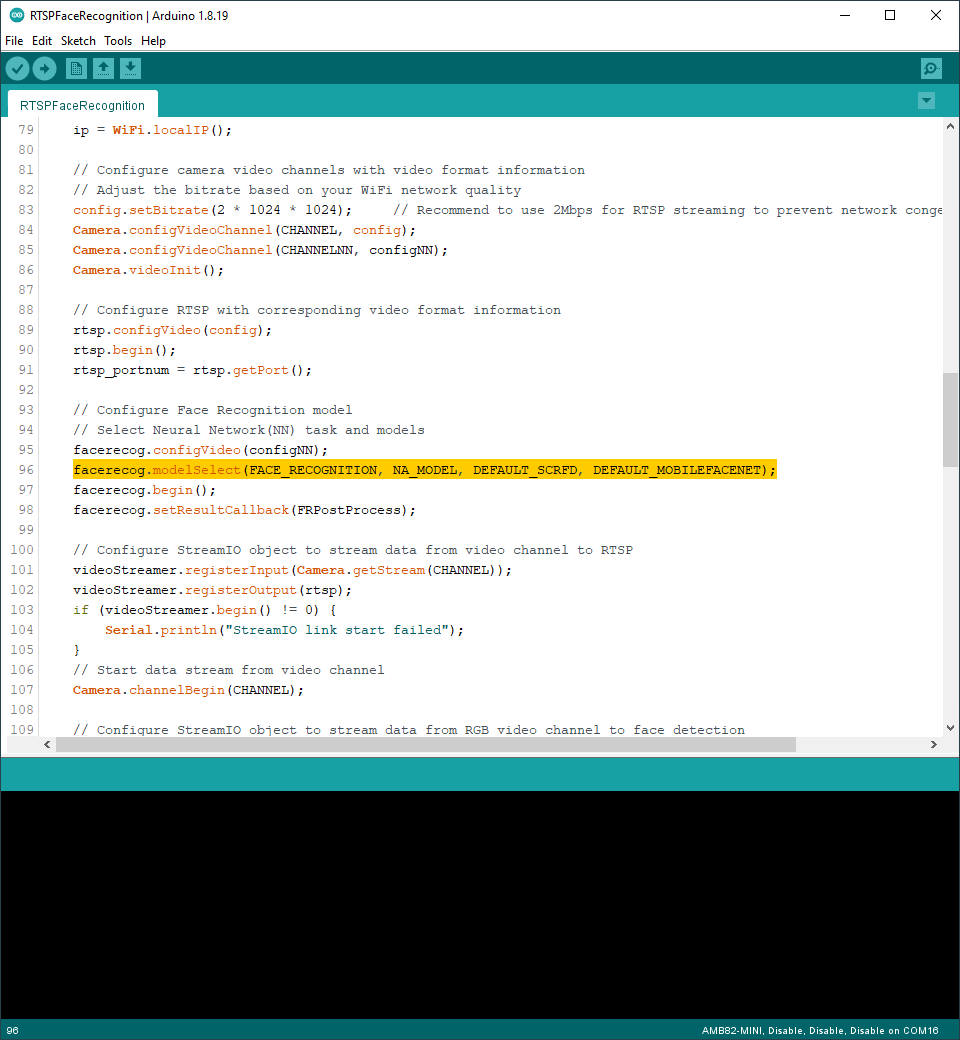
Select Neural Network (NN) task and models using modelSelect() function highlighted in yellow. This function takes 4 arguments: Neural Network task, Object Detection model, Face Detection model and Face Recognition model. Replace with “NA_MODEL” if they are not necessary for your selected Neural Network task. Note that it is mandatory to call modelSelect() function before calling the begin() function.
Valid Neural Network task: OBJECT_DETECTION, FACE_DETECTION, FACE_RECOGNITION
Valid Object Detection model:
YOLOv3 model: DEFAULT_YOLOV3TINY, CUSTOMIZED_YOLOV3TINY
YOLOv4 model: DEFAULT_YOLOV4TINY, CUSTOMIZED_YOLOV4TINY
YOLOv7 model: DEFAULT_YOLOV7TINY, CUSTOMIZED_YOLOV7TINY
Valid Face Detection model: DEFAULT_SCRFD, CUSTOMIZED_SCRFD
Valid Face Recognition model: DEFAULT_MOBILEFACENET, CUSTOMIZED_MOBILEFACENET
Choose the customized option (e.g., CUSTOMIZED_YOLOV4TINY/ CUSTOMIZED_SCRFD/ CUSTOMIZED_MOBILEFACENET) if you would like to use your own NN model. To learn about the process of converting an AI model, refer to here. Additionally, refer to here to understand how to install and use the converted model.
Compile the code and upload it to Ameba. After pressing the Reset button, wait for the Ameba Pro 2 board to connect to the WiFi network. The board’s IP address and network port number for RTSP will be shown in the Serial Monitor.
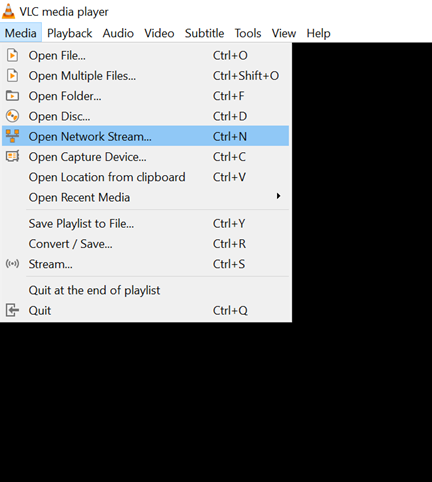
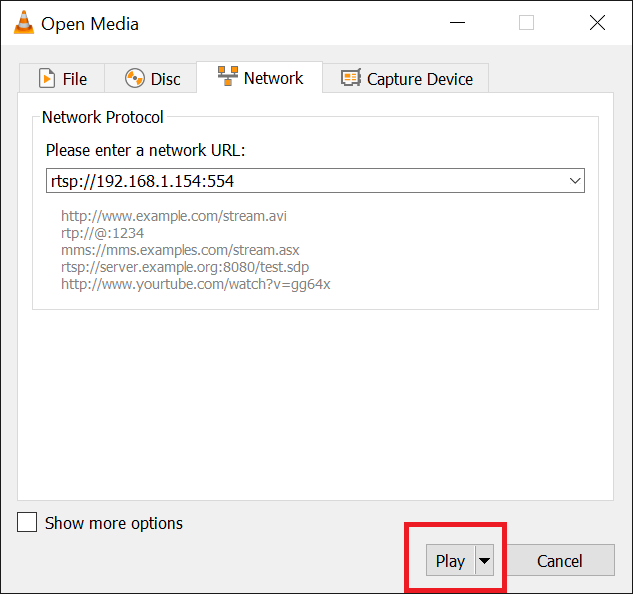
The result can be validated using VLC. You may download VLC media player from the link here (https://www.videolan.org/vlc/).
Upon the completion of the software installation, open VLC media player, and go to “Media” -> “Open Network Stream”.
Make sure your PC is connected to the same network as the Ameba Pro2 board for streaming. Since RTSP is used as the streaming protocol, key in “rtsp://{IPaddress}:{port}” as the Network URL in VLC media player, replacing {IPaddress} with the IP address of your Ameba Pro2 board, and {port} with the RTSP port shown in Serial Monitor (e.g., “rtsp://192.168.1.154:554”). The default RTSP port number is 554.
Next, click “Play” to start RTSP streaming to see the result. The video stream from the camera will be shown in VLC media player.
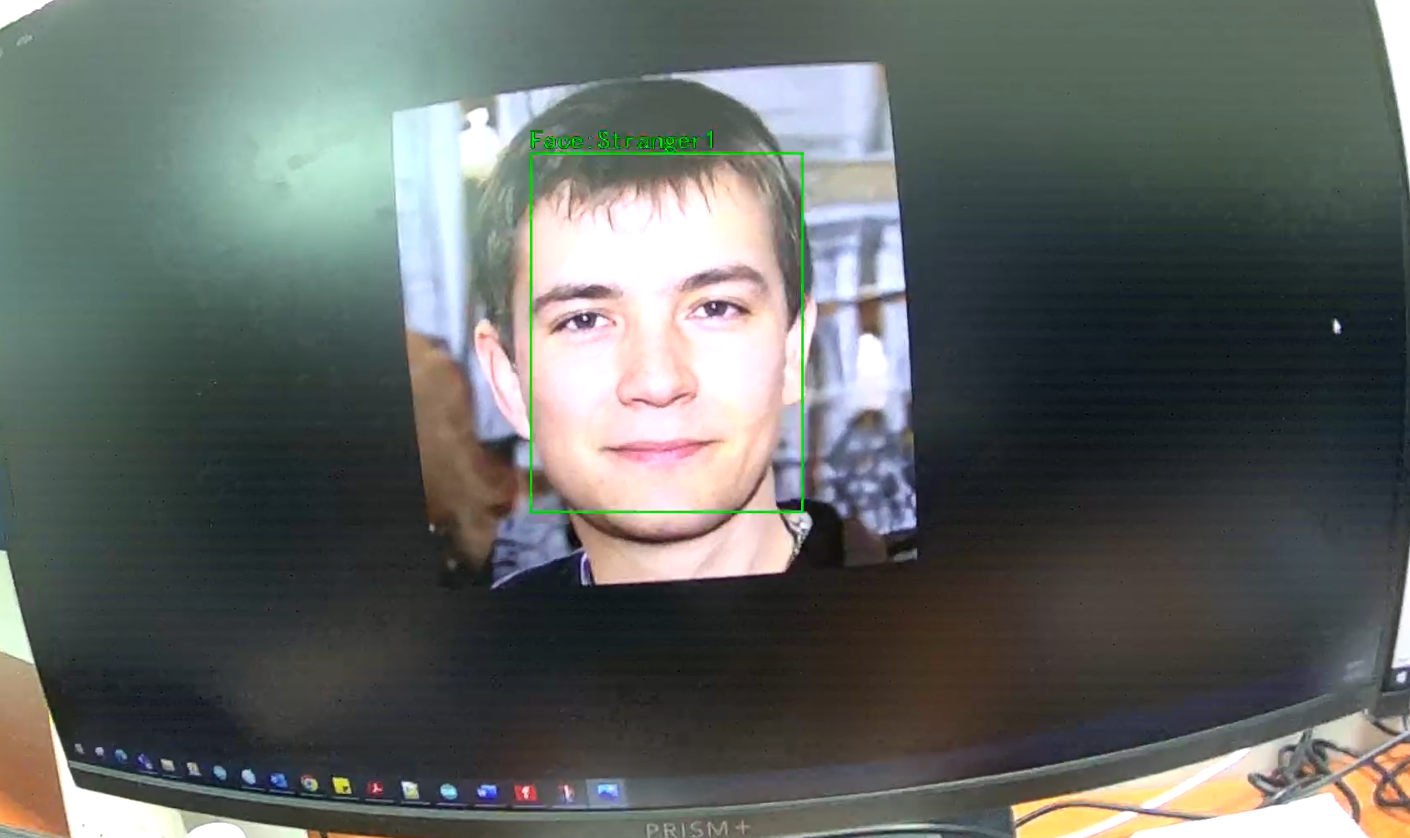
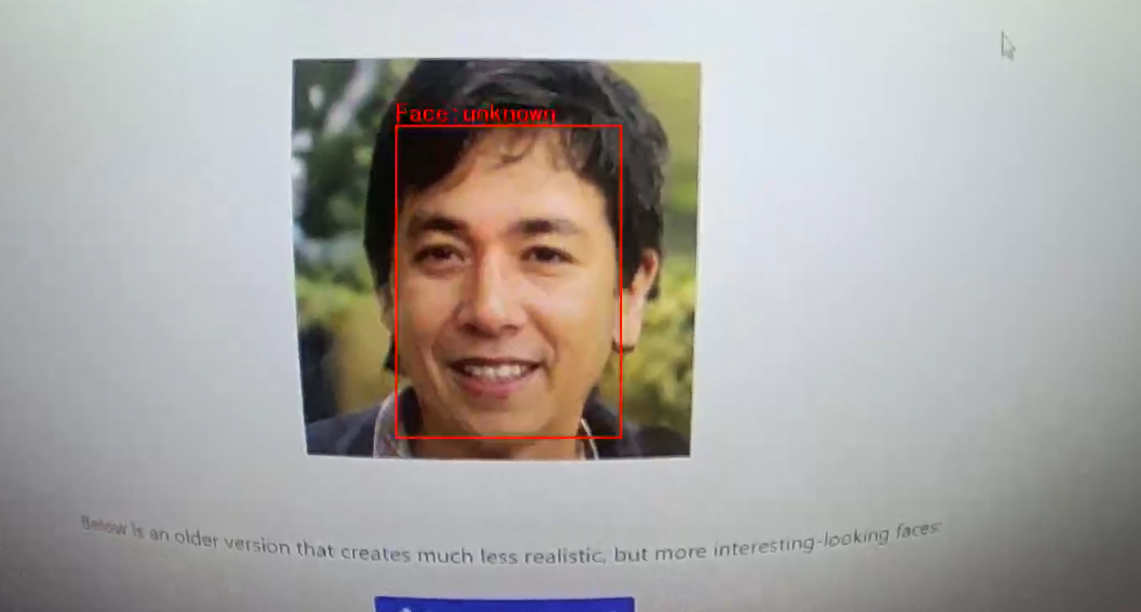
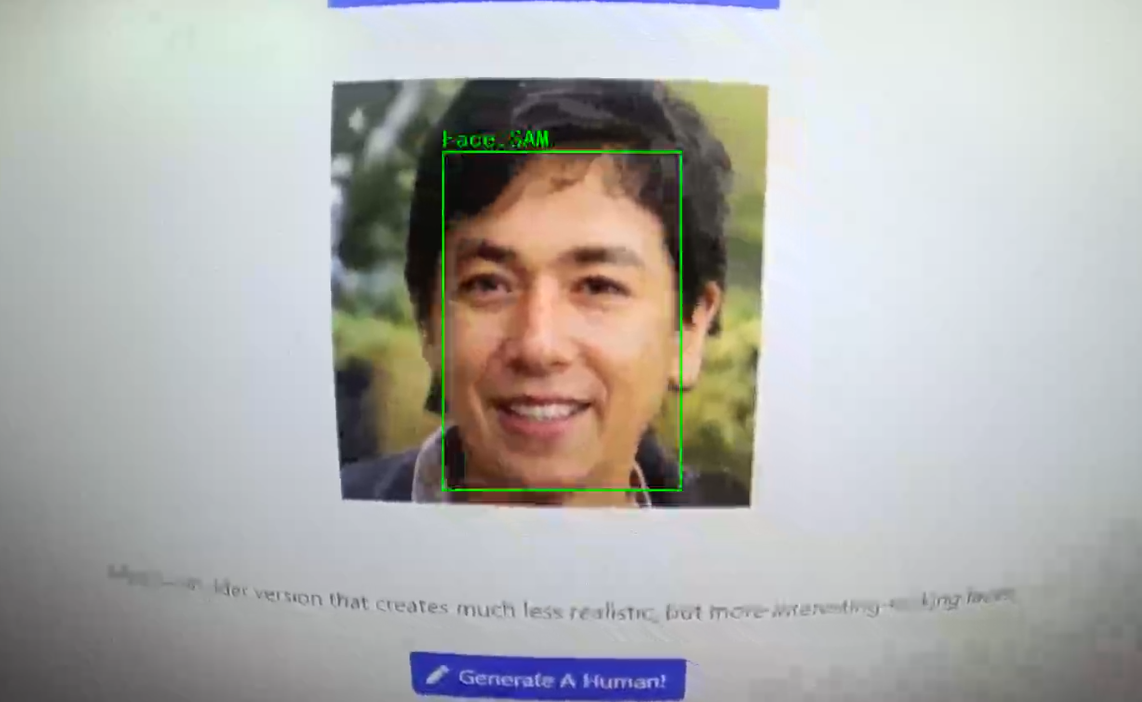
The faces detected by the face recognition neural network model are initially labelled as “unknown”, faces need to be first registered with a name before they can be recognized.
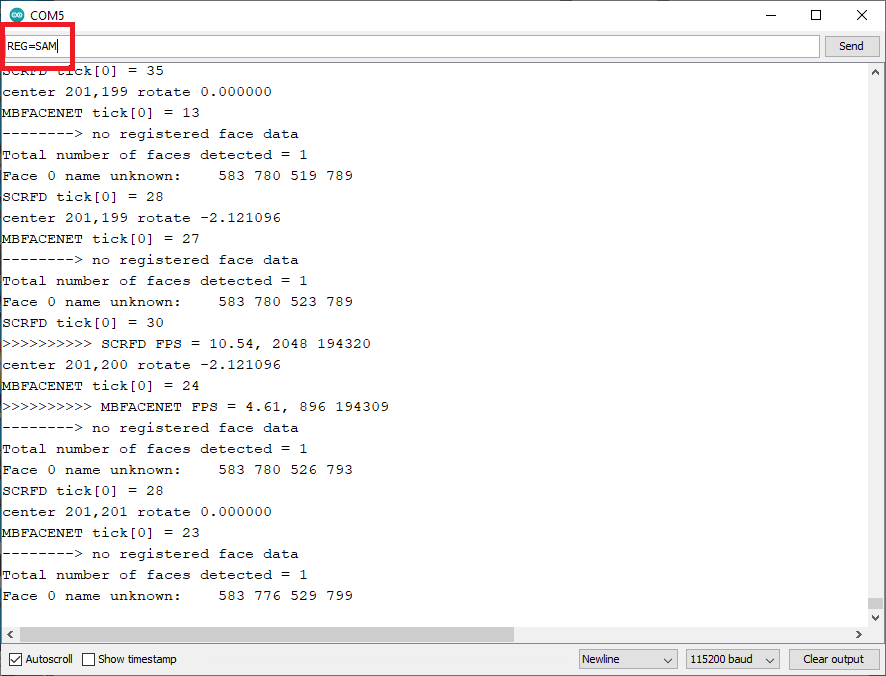
Aim the camera at a face and enter the following commands in the Serial Monitor. When it is in face registration mode, the green and red LEDs will be blinking.
To register a face:
Note: Multiple faces can be registered. However, when registering a face, ensure that there is only one face in the frame.
To register a face, aim the camera to a targeted face and enter “REG={Name}” to give the targeted face a name. For example, “REG=SAM”.
To remove a specific registered face:
Enter the command “DEL={Name}” to delete a certain registered face. For example, “DEL=SAM”.
To reset all registered faces:
Enter the command “RESET” to forget all previously registered faces. All previously assigned faces and names will be removed. You may register a face again by entering the face registration mode.
To backup and restore registered faces to and from flash:
Enter the command “BACKUP” to save a copy of registered faces to flash. If a backup exists, enter the command “RESTORE” to load registered faces from flash.
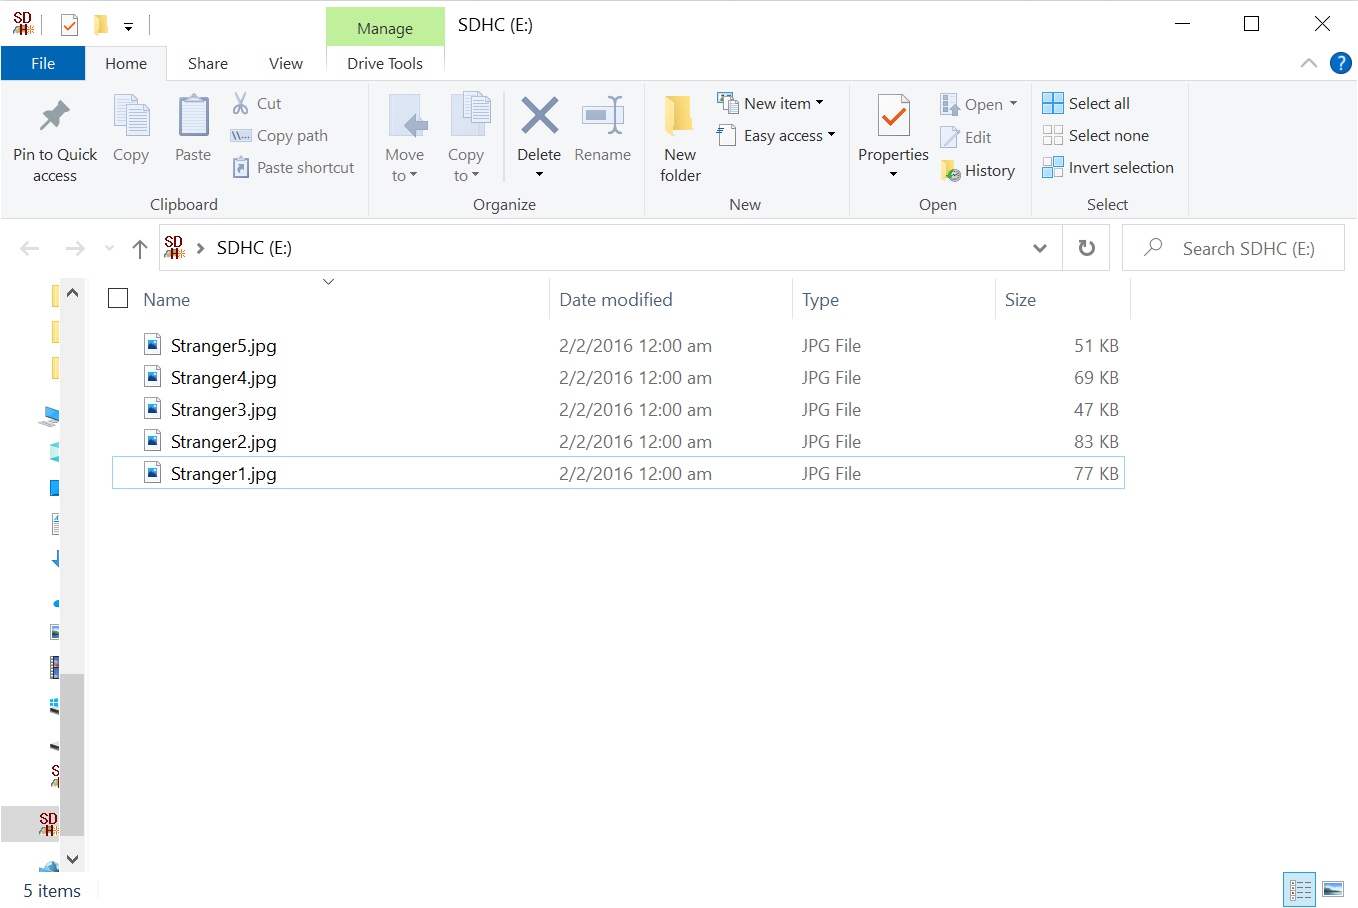
Press and hold the button for 2 seconds to enter snapshot mode to take snapshots when unrecognized faces are detected. The unknown faces will then be registered as Stranger and saved to an SD card as Stranger{strangerCounter}.jpg. Red LED will light up when one or more unknown faces detected.