1. 下載 Ameba 客製化版 TensorFlow Lite Microcontrollers 庫 https://github.com/ambiot/ambd_arduino/blob/master/Arduino_zip_libraries/Ameba_TensorFlowLite.zip。 按照 https://www.arduino.cc/en/guide/libraries說明來安裝。
2. 從 https://github.com/ambiot/ambd_arduino/blob/master/Arduino_zip_libraries/Ameba_ArduCAM.zip 下載 Ameba_ArduCAM 庫。 按照 https://www.arduino.cc/en/guide/libraries 中的說明進行安裝。
3. 在 Arduino IDE 庫管理介面中,安裝“JPEGDecoder”庫。 此範例已使用“JPEGDecoder”庫 1.8.0 版本進行了測試。 安裝該庫後,您需要對其進行配置以禁用一些與 RTL8722DM 不兼容的可選組件。 打開以下文件:
– Arduino/libraries/JPEGDecoder/src/User_Config.h
確保“#define LOAD_SD_LIBRARY”和“#define LOAD_SDFAT_LIBRARY”都被註解掉,如文件摘錄所示:
// #定義 LOAD_SD_LIBRARY
// #定義加載SFFAT_LIBRARY
4. 使用 https://github.com/ambiot/ambd_arduino/tree/master/Ameba_misc/TensorFlowLite_patch 中的patch文件,按照同一路徑下的“readme.txt”進行操作。
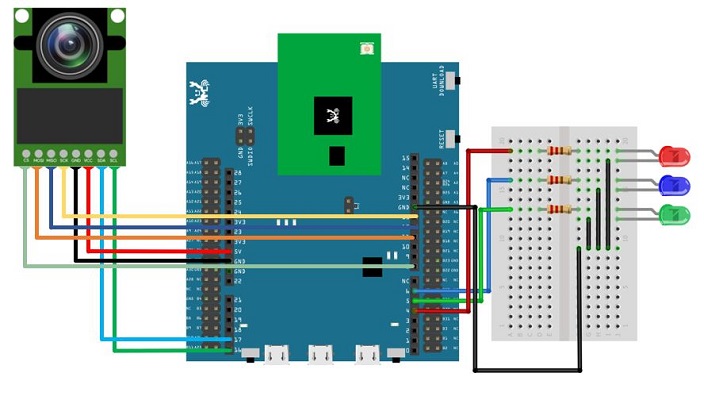
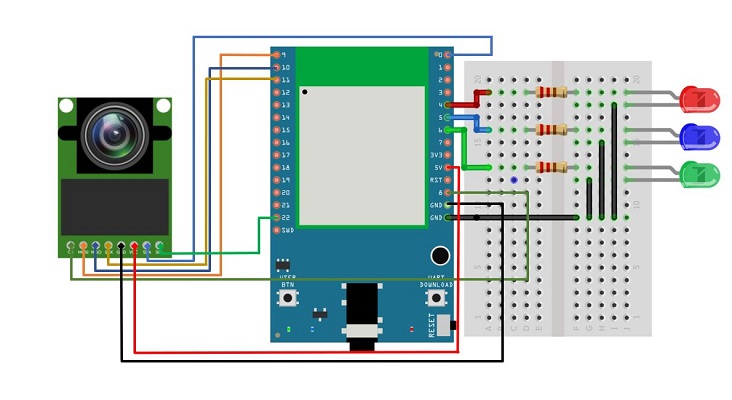
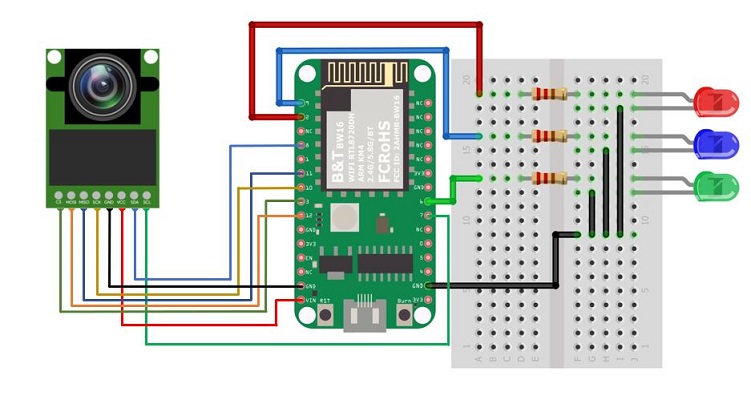
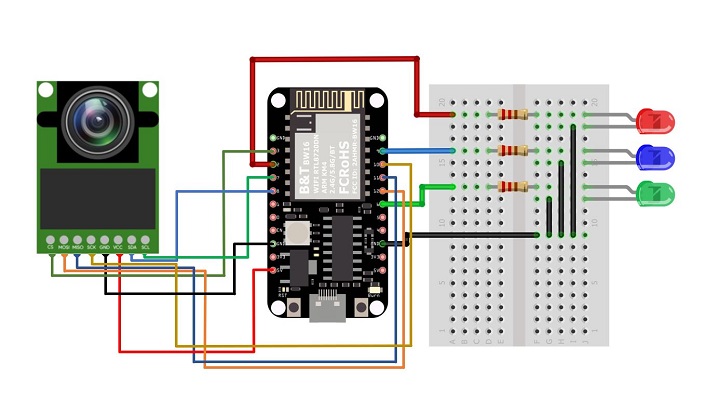
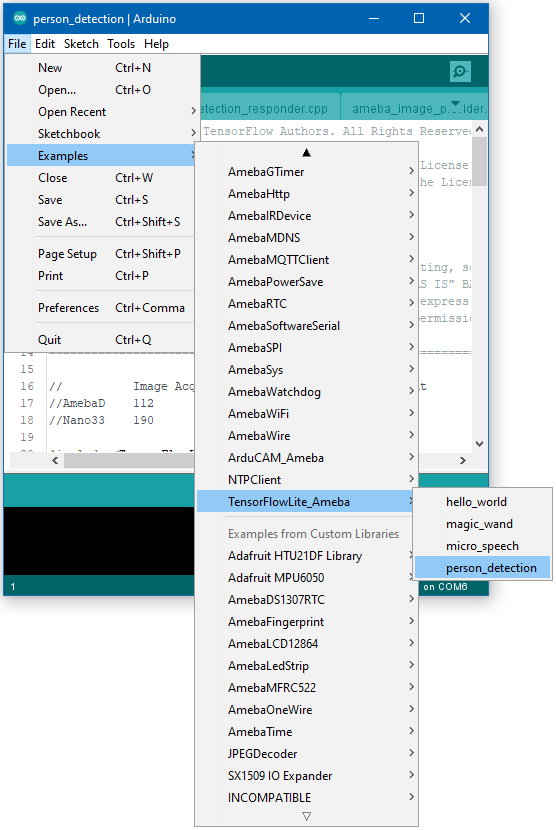
打開範例,”Files” -> “Examples” -> “TensorFlowLite_Ameba” -> “person_detection”。
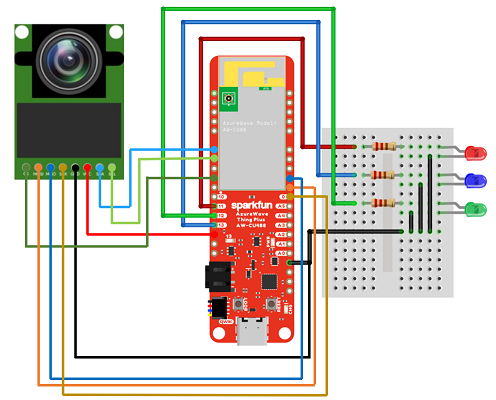
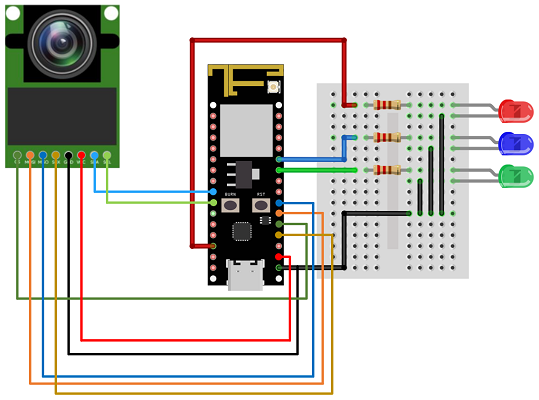
用戶可以使用板上的任何 GPIO 引腳來定義 LED 引腳。
上傳代碼並在上傳完成後按Ameba上的重置按鈕。
一旦運行,您應該會看到藍色LED每隔幾秒鐘閃爍一次,表明它已完成圖像處理。 如果確定在先前拍攝的圖像中沒有人,則紅色LED會亮起,如果確定有人,則綠色LED會亮起。
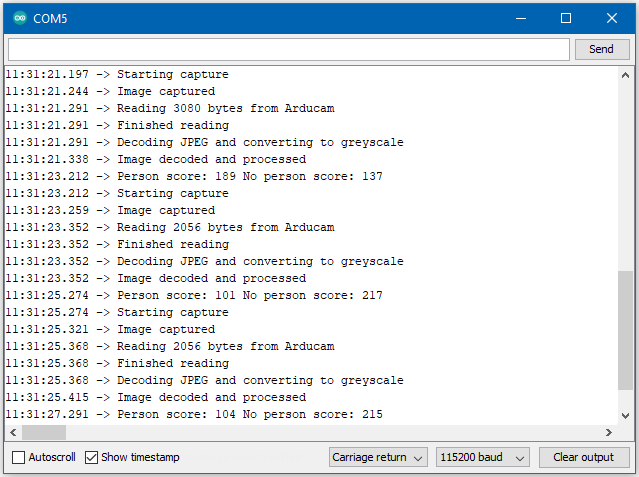
推理結果也將輸出到Arduino串行監視器,其顯示如下:
程式碼說明
有關TensorFlow Lite for Microcontrollers的更多信息,請參考以下網址: https://www.tensorflow.org/lite/microcontrollers
