• 在https://github.com/ambiot/ambd_arduino/tree/master/Arduino_zip_libraries 下載Ameba客製版TensorFlow Lite。
• 從 Arduino IDE Library 下載“Arduino_LSM9DS1.h”庫:
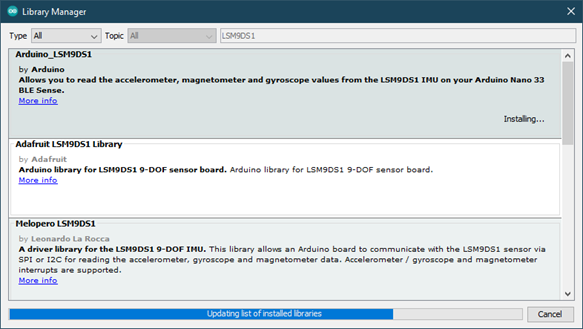
• 按照https://www.arduino.cc/en/guide/libraries 中的說明進行安裝。
• 確保在 https://github.com/ambiot/ambd_arduino/tree/master/Ameba_misc/ 中找到patch文件
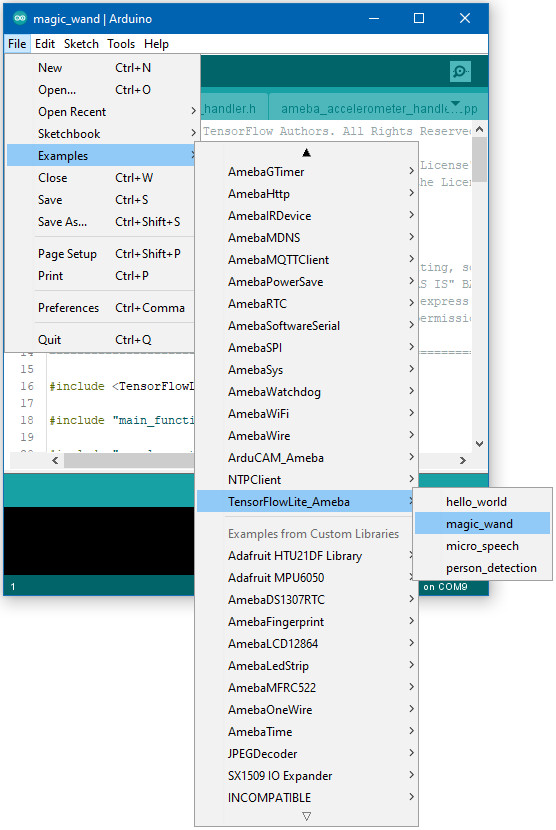
打開範例,“Files”→“Examples”→“TensorFlowLite_Ameba”→“magic_wand”。
上傳代碼並在上傳完成後按Ameba上的重置按鈕。
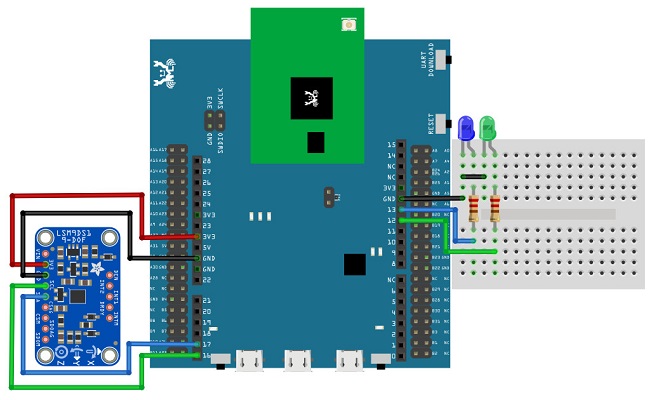
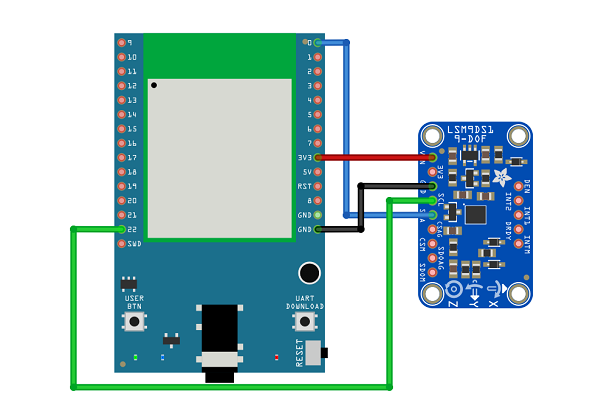
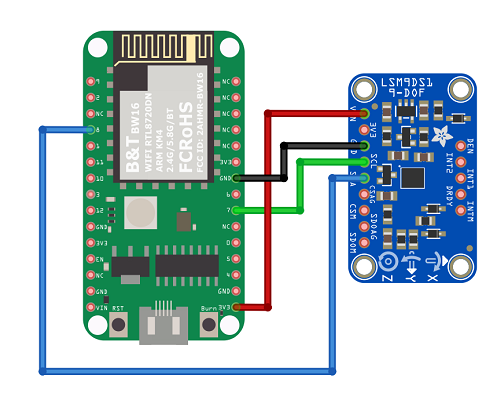
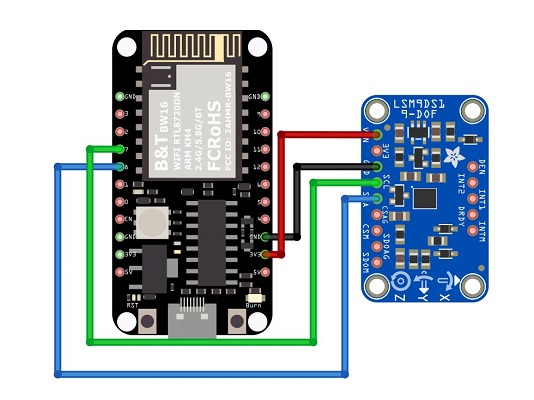
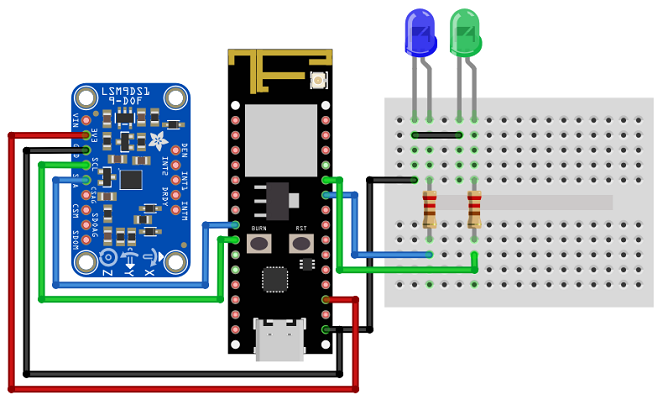
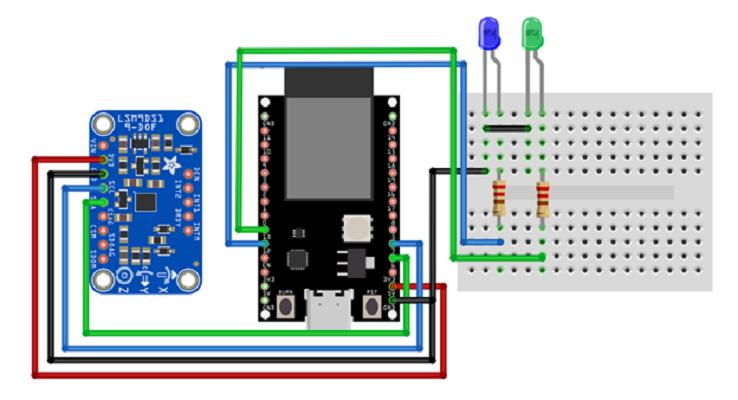
保持加速感測器穩定,使x軸的正極指向右側,z軸的正極指向上方,按照所示形狀移動加速感測器,使其平穩運動1至2秒鐘,避免劇烈運動。
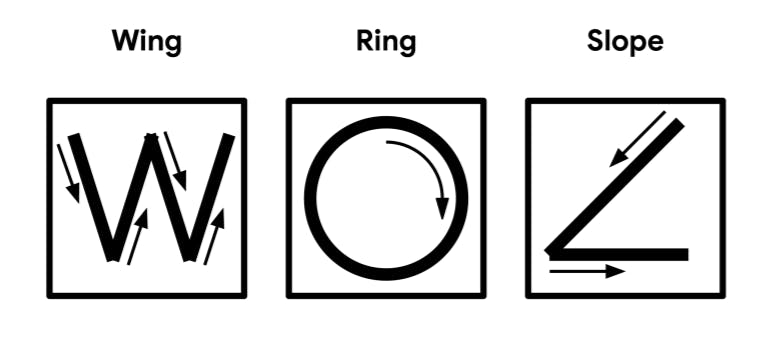
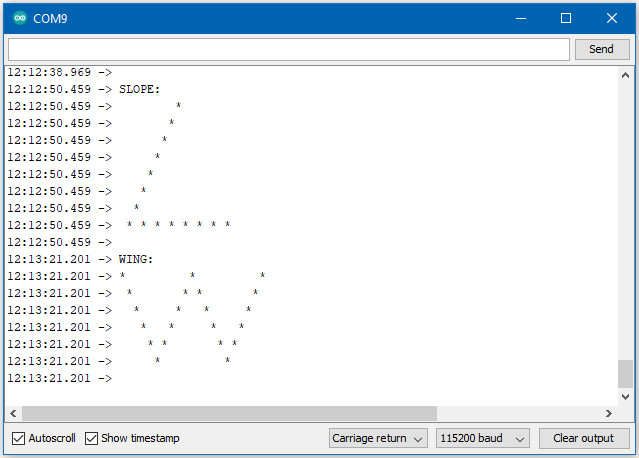
如果Tensorflow Lite模型可以識別移動,則應該看到相同形狀的輸出到Arduino串行監視器。對應於不同的識別手勢,不同的LED將亮起。
請注意,機翼形狀易於實現,而坡度和環形形狀則更難於正確定位。
程式碼說明
有關TensorFlow Lite for Microcontrollers的更多信息,請參考以下網址: https://www.tensorflow.org/lite/microcontrollers
